Pages in Documentation

Settings

UI3 Overview

[old] Doors UE5
Quick Guide 2026
Quick Start
Swap Actor
Custom Assets
System Drawings
Guide 2022
Tips & FAQ
Guide 2024
Fix Bugs

FAQ

Cost Tracking

Modes
Other Features
Designer

Edit Scene
Var Actor
UI Layout
New in 2026
Multi-Unit-Prj
Google Data Sheets
Data Tables
Video Guides

Quick Videos
Designer
Cost Tracking
Widget Panels
Quick Guide
Scene Settings
Connect BP

VR projects
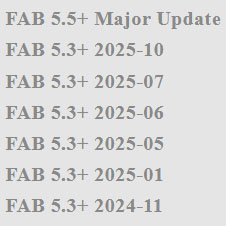
Version History
F. w. Preview
Fix Known Bugs
UI Settings
UI Layout
Gamemode

FAQ + TIPS
V4 Functions 2
V4 Functions P1

V4 Quick Guide
Ver History
V3 Placements
V3 Mesh Def.
V3 Segments
V3 Quick Start
Books V2
Books V1
Customize
Quick Guide
Swap Actor
FAQ + TIPS
Doors UE4 (V1)

3.1 Bugs Fixes
Ver History
![[2 A] Generic Meshes On Spline Blueprint ../images/architecture/0023/v2-generic/thumbs/01.jpg](../images/architecture/0023/v2-generic/thumbs/01.jpg)
V2 Generic BP
![[2 B] Generic Spline Blueprint Examples ../images/architecture/0023/v2-examples/thumbs/01.jpg](../images/architecture/0023/v2-examples/thumbs/01.jpg)
V2 Examples
![[1] Railings Clone Blueprint Documentation ../images/architecture/0023/v1/thumbs/01.jpg](../images/architecture/0023/v1/thumbs/01.jpg)
V1 Railings Fences

UI 1 - Part 1
UI 1

Ui 1 - Part 2

1 Overview
UI2 Features
UI2 Get Started
UI2 Info Map
UI2 BP Actors
UI2 User Manager
UI2 FAQ
UI2 Tutorials

UI3 Overview
Getting Started

3.1 Info Map
Variation Actor
Blueprints
[2 A] Generic Meshes On Spline Blueprint
A Blueprint that gives you many possibilities to place meshes along a spline.

Content:

Main Elements of the Spline Blueprint
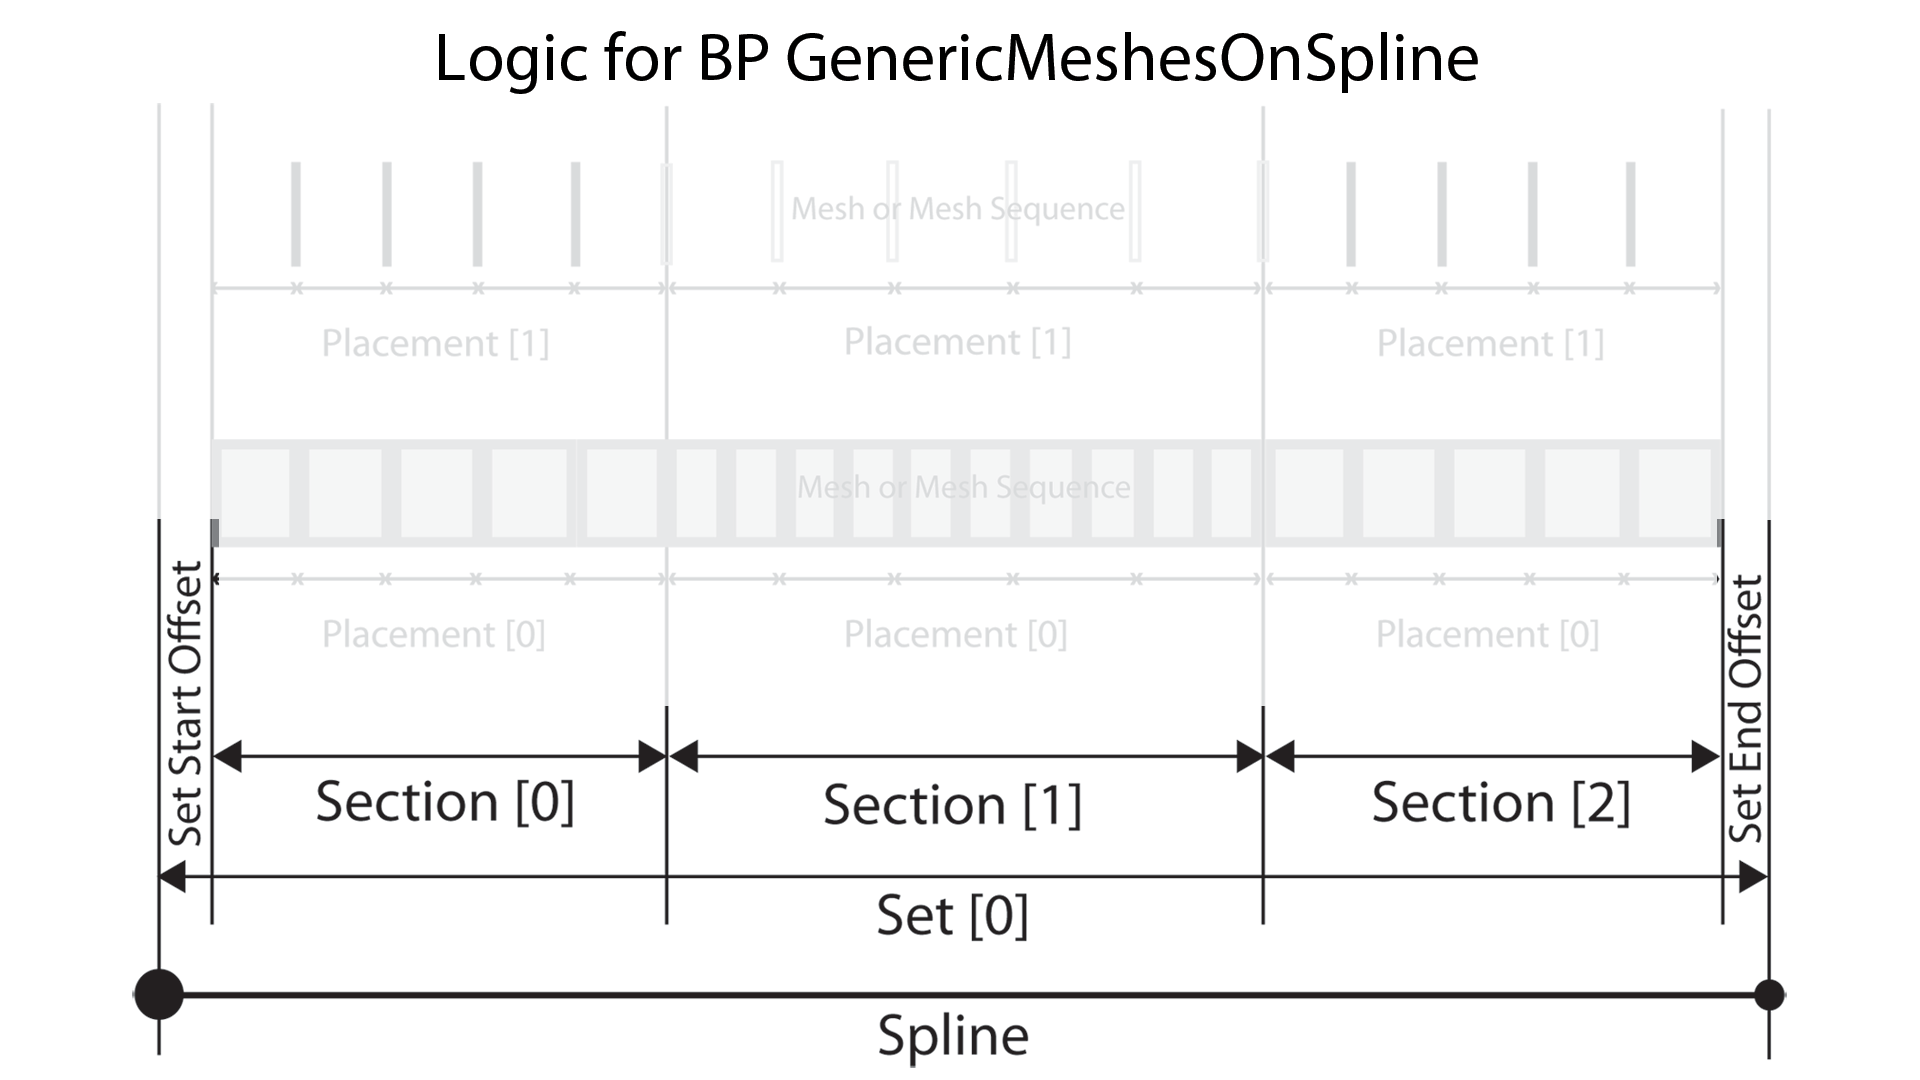
This blueprint can be a bit overwhelming. The Details Panel in Unreal only has limited options to categorize parameters. So here is an introduction into the main elements to place static meshes along the spline:Set
In most cases you will only have one set. It's a container for the rest of the elements. A set lets you use the same spline for multiple mesh placement so you do not have to duplicate the spline.
Sections
Sections divide the spline. Each part of the spline can have meshes placed independently from the other part. An example would be to have a different looking start or end mesh.
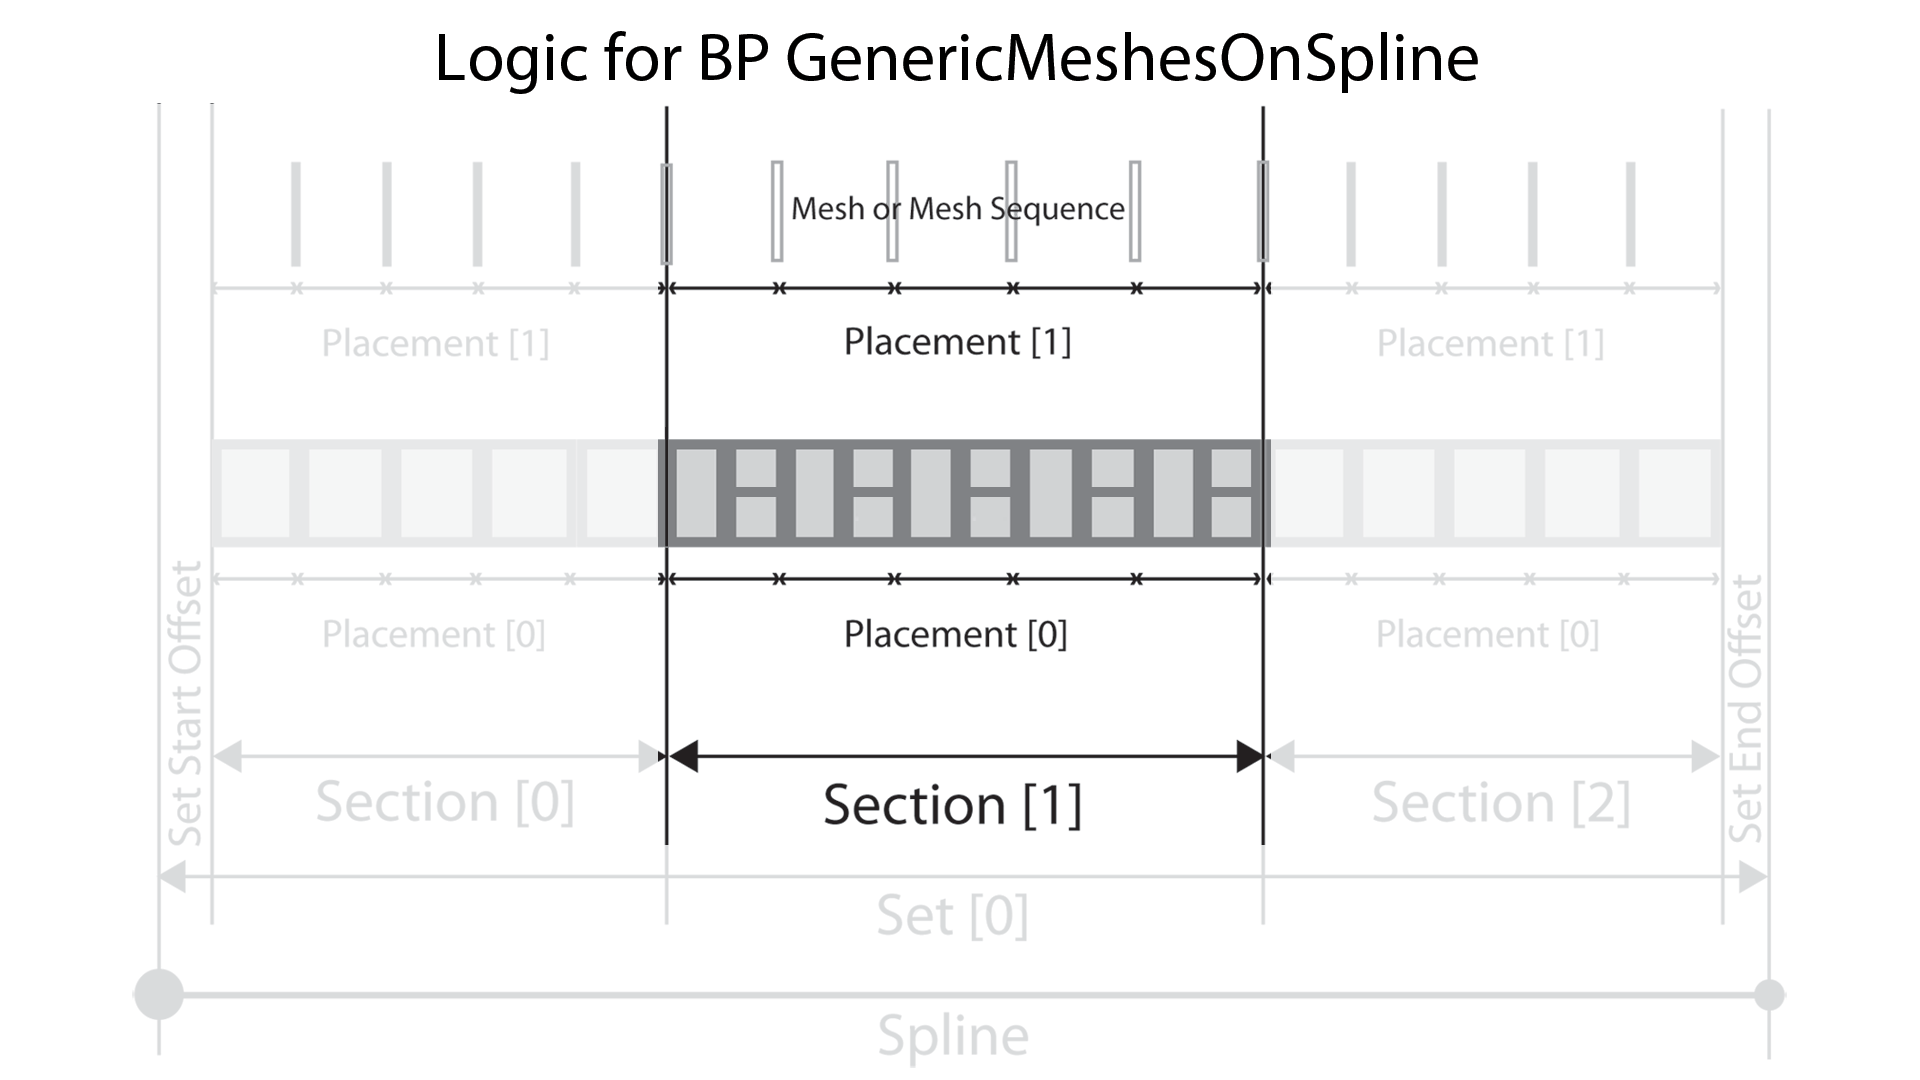
Placement
Every section needs to have at least one placement. This is where you define how the static meshes are placed along the spline. If they are stretched or have gaps for example.
You can have multiple placements per section. For example one placement of windows and another placement for steel posts between the windows.
Placements can be copied with an incremental value. You could place one horizontal row of windows, and then copy the placement to the next building level.
Mesh Sequences
In most cases a sequence of meshes is only one mesh. For example a section of a building façade.
Sequences, as the name suggest, let you create multiple different meshes in a sequence. In the façade example that could be different looking window segments that are alternating along the spline.
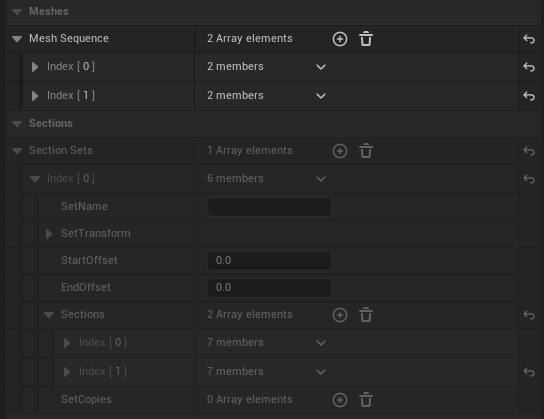
Mesh Sequences
I already mentioned that a Mesh Sequence will only have one static mesh in most cases. You have to create a seperate Mesh Sequences for each different mesh you want to use on sections. Using a standard railing segment and a different looking end segment will require two seperate Mesh Sequences.You can actually create sequences of different looking railing segments here. They will be treated as one mesh when placed on a spline section. A sequence of two meshes of type A and one mesh of type B will always appear in that sequence. AAB-AAB-AAB
To create a sequence like B-AAB-AAB-AAB you would need a separate Mesh Sequence that only contains the mesh type B and use it in a separate start Section of the spline Set. You would have 2 Sections: One with mesh B and then the other one with the meshes AAB.
| > Meshes | |
| > Mesh Sequence | A sequence (group) is either a single mesh or a sequence of different meshes that repeat within the placement. |
| > Index [0] | The first sequence (group) of meshes. Can be a single mesh. |
| > Mesh | The meshes for this sequence |
| > Index [0] | first mesh of this sequence. Can be the only mesh. |
| Description | a note for you about this mesh |
| Static Mesh | Pick a mesh from the browser |
| Amount | how many meshes will be repeated within the sequence. Here there are 3 windows between each metal pole. |
| Materials | Optional list of replacement materials for material IDs |
| Orientation | Use the drop down menu to align the mesh correctly along the spline |
| Overlap | This will overlap the next mesh instance with the current one. |
| > Mesh Transform | This can compensate any misalignements with
the spline Do not use the Z rotation. Use Orientation instead Scale the mesh here. It will effect the placement calculation |
| EndGap | This makes room for another placement at the end of this mesh sequence. |
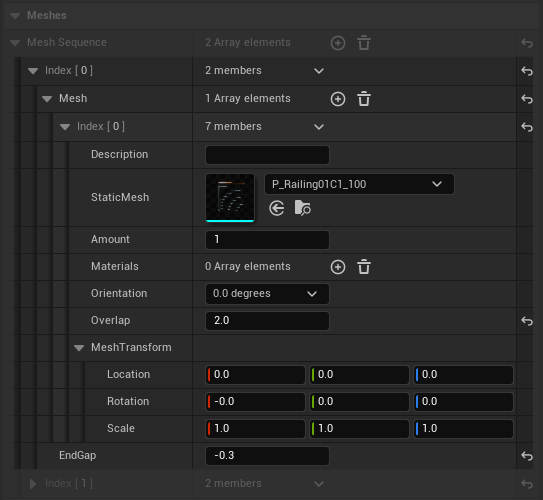
Section Sets
By default the spline already has a Section Set with index [0]. You can add another Set by adding an array element index [1]. This new set will use the same spline. It's as if you copied the spline and give it a new set of sections.
| > Sections | |
| > Section Sets | A Section Set can be filled up with Sections. You can have mulitple Sets of Sections |
| > Index [0] | The first Set of Sections |
| SetName | Just a note for you. |
| > Set Transform | This will transform the Set and all its content relative to the spline. Only location and Scale transforms make senes here. |
| StartOffset | Use this to inset the sets content at the start of the spline |
| EndOffset | a note for you about this mesh |
| > Sections | Add sections here. See next chapter. |
| > SetCopies | Copies of the entire set. You can have multiple arrays of copies here |
| > 0 | The first set of copies |
| Copies X | How many copies you want. Location offset will be incremental for each copy. |
| > Location Offset | Incremental offset for the set copies. |
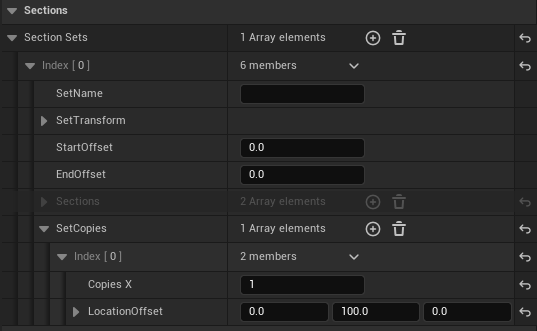
Sections
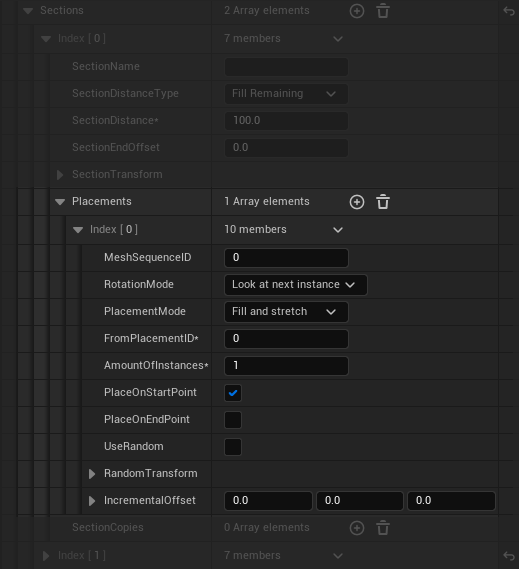
Sections divide the spline into parts. Each part can get a different mesh applied. Adding a mesh is done through Placements. See further down.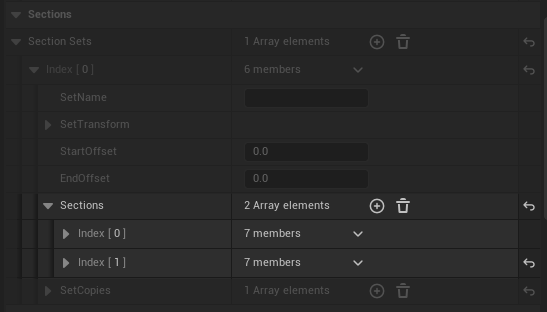
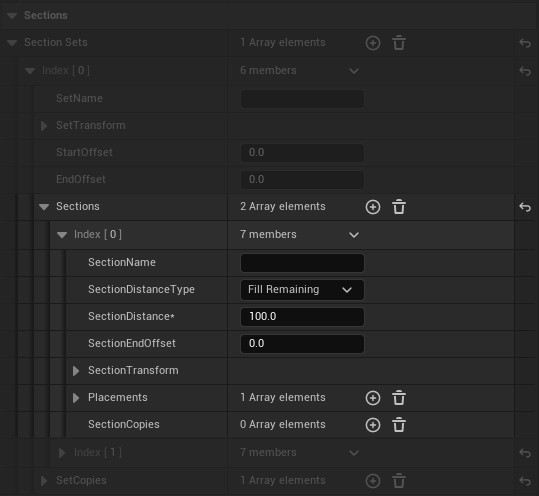
| > Sections | A Set extends over the entire spline. Sections are subdivisions of Sets. |
| > index [0] | The first section of the set. |
| SectionName | Just a note for you. |
| Section Distance Type | Fill Remaining The section will grab a part of the remaining unfixed space based on the SectionDistance |
| Fixed Distancce A fixed distance given as Section Distance. | |
| From Placement The section size will be set to the largest placement's size of this section. | |
| Fixed Gap A fixed empty gap. Remove all placements from this secion to make this work. | |
| Section Distance | A fixed distance or the relative distance for section set to fill the space. |
| Section End Offset | Will offset the next section effectively making this section shorter. |
| > Section Transform | This will transform the Section and all its content relative to the spline. Only location and scale transforms make sense here. |
| > Placements | Add Placements here. See next chapter. |
| > Section Copies | Copies of the entire set. You can have multiple arrays of copies here |
| > index [0] | The first set of Section copies |
| Copies X | How many copies you want. Location offset will be incremental for each copy. |
| > Location Offset | Incremental offset for the Section copies. |
Placements
Placements are used to place meshes along the spline for a section. Use the ID of the Mesh Sequence you set up as the Mesh Group ID here and the mesh(es) will be placed on the spline. You can have more than one placement per section.
| > Placements | Placements of meshes or sequences for the current Section. |
| > index [0] | The first Placement of the set. Placements are put 'on top' of each other. |
| Mesh Group ID | The ID of the Mesh or Mesh Sequence you have set up in the Meshes section. |
| Rotation Mode | Look at next instance The mesh will line up with the next instance along the spline |
| Spline rotation The mesh will be rotated like the spline rotation. Use for poles. | |
| Default The rotation set in the Mesh Sequence transform | |
| Placement Mode | Fill and stretch The Section will be filled with the closest number that fits and then all meshes will be stretched to fit exactly. |
| Fill but don't stretch The Section will be filled with the closest number leaving a gap at the end | |
| Fill with amount stretched The Section will be filled with a given amount and the meshes will be stretched to fit exactly. | |
| Fill with amount Add a given amount equally spread over the Section. For poles, trees etc. | |
| Manual Add a given amount of meshes and leave the rest empty. | |
| From Placement ID Use the logic of another Placement ID | |
| Spline Mesh Use a spline mesh that can bend along the spline. The mesh will need extra sub divisions to be bend. The Spline will need extra spline points for a smooth curve. | |
| From Placement ID | The ID of another Placement used for the current Placement's logic. |
| Amount Of Instances | Amount for manual placements (excluding the end point) |
| Place On Start Point | The first mesh will be placed |
| Place On End Point | A final mesh will be placed at the end of the section. Good for poles or trees, etc. |
| Use Random | If true every mesh (group) will be randomly transformed with below values. |
| > Random Transform | This wil randomly transform every instance. For example a location offset X=20 will transform a random value between -10 and +10. |
| > Incremental Offset | Incremental offset for the Placement copies. |
 Top of page