Pages in Documentation

Settings

UI3 Overview

[old] Doors UE5

Quick Start

Swap Actor

Custom Assets

System Drawings

Step by Step

Tips & FAQ

Settings

Multi-Unit-Prj

Google Data Sheets

Data Tables

Video Guides

Quick Videos

Designer

Cost Tracking

Widget Panels

Quick Guide

Scene Settings

Connect BP

VR projects

Version History

F. w. Preview

Fix Known Bugs

UI Settings

UI Layout

Gamemode

FAQ + TIPS

V4 Functions 2

V4 Functions P1

V4 Quick Guide

Ver History

V3 Placements

V3 Mesh Def.

V3 Segments

V3 Quick Start

Books V2

Books V1

Customize

Quick Guide

Swap Actor

FAQ + TIPS

Doors UE4 (V1)

3.1 Bugs Fixes

Ver History
![[2 A] Generic Meshes On Spline Blueprint ../images/architecture/0023/v2-generic/thumbs/01.jpg](../images/architecture/0023/v2-generic/thumbs/01.jpg)
V2 Generic BP
![[2 B] Generic Spline Blueprint Examples ../images/architecture/0023/v2-examples/thumbs/01.jpg](../images/architecture/0023/v2-examples/thumbs/01.jpg)
V2 Examples
![[1] Railings Clone Blueprint Documentation ../images/architecture/0023/v1/thumbs/01.jpg](../images/architecture/0023/v1/thumbs/01.jpg)
V1 Railings Fences

UI 1 - Part 1

UI 1

Ui 1 - Part 2

1 Overview

UI2 Features

UI2 Get Started

UI2 Info Map

UI2 BP Actors

UI2 User Manager

UI2 FAQ

UI2 Tutorials

UI3 Overview

Getting Started

3.1 Info Map

Variation Actor

Blueprints
Universal Doors (V.2) Unreal 5 :: Documentation
Version 2 (2023) of the Universal Door Blueprint is an improved version for Unreal 5 supporting Nanite and Lumen.
Note that the Unreal 4 version does not have this update and is optimized for performance (draw calls) instead. It is slightly different and does not have double doors or the barn door type. The Unreal 4 version V1 will not be updated in the future.
Content:
Door Parts
An overview of all the door parts that can be changed. The door opens to the inside. Handle Outside means the door handle on the other side of where the door opens to. Which is usually the entry door handle.Something in general: There are many settings available. Let me know if you think something should be available that isn't at the moment.

Quick Guide
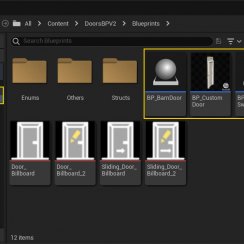
There are 4 blueprints available:- BP_StandardDoor
- BP_SlidingDoor
- BP_BarnDoor
- BP_CustomDoor
They have the same settings more or less, with the exception of the Custom Door blueprint which is made for using any door or frame mesh (gates, etc). See further down for more info.
The main door types (standard, sliding, barn) have a double door option, share hardware and door meshes, and have a feature to auto align doors to the frame. All doors can open and close when the player approaches, or with a key press.
General - Door - Frame
| > General | |
| Frame Type | Select a frame style from the list |
| Door Size | Select a size from the list. The letter in brackets indicates what door size is initially used. For example (M) means it is one of the medium sized doors that are located in the Content/Doors/M folder. |
| Door Type | Select a door style from the list. There are 5 pre-set styles available. You can also choose a Custom Door. See in the Door section for detals. |
| Door Mobility |
|
| Flip Door | This will flip the door so the handle is on the opposite side. |
| Is Double Door | Will turn this into a double door. |
| Door Rotation (Location) | How far a non-movable door will stand open. Set to 0.0 for movable doors. |
| Door 2 Rotation (Location) | How far the 2nd non-movable door will stand open. Set to 0.0 for movable doors. |

| > Door | |
| > Materials Door | Add an array element for each of the material you want to change. |
| Index [0] | The array ID equals the material ID (in Unreal). If you would want to change index [2] you would need to add 3 array elements and leave [0] and [1] empty. |
| Glass Material Door | Add a material for the Glass Mesh which is seperate for door styles 4 and 5. |
| Custom Door Mesh | You can add a custom door mesh here. Set the Door Type to Custom Door. Then check the letter in brackets, like (M). Go to the Doors/M folder and choose one of the additional doors in there. |
| Custom Door Glass Mesh | Add an optional custom glass mesh for your door. |
| Note: | Want to use your own door? Set the door type to <i>Custom</i> under General. Then add your door as <i>Custom Door Mesh</i>. Rotate the door with <i>Door Rotation Correction</i> if necessary. Hit <i>Calculate Scale and Offset</i> to auto-fit the door into the choosen frame. |
| > Advanced | |
| None S-M-L Door | Tick this to enable auto scale for doors that don't fit into the frame as they are. This tells the blueprint that the door doesn't have the standard size and position for this frame. |
| Door Rotation Correction | Use this to rotate the custom door mesh into the correct direction. |
| Thickness Scale | You can add a thickness scale here. So you don't have to repeatedly change the value in the <i>Custom Door Scale</i> |
| Calculate Scale and Offset | Click here to auto-fit the door. This works
best when the door doesn't have any handles or shutters or other
elements that stick out of the door box shape. Use this if you want to use one of the doors from the package where the size isn't available. Scaling may be visible. |
| > Custome Door Offset | Modify the calculated offset if necessary. |
| > Custoom Door Scale | Modify the calculated scale if necessary. |

| > Frame | |
| Has Top Window | The door can have a top frame part with a fixed window. Only frame style 'standard' available for that window. |
| Top Window Scale Z | Adjust the height of the top frame window |
| > Materials Frame | Add an array element for each of the material you want to change. |
| Index [0] | The array ID equals the material ID (in Unreal). If you would want to change index [2] you would need to add 3 array elements and leave [0] and [1] empty. |
| > Materials Top Mesh | Add custom materials here for the top window mesh. If empty the frame materials will be applied. |
| Glass Material Top | Change the glass material here if needed. |
| Custom Frame Mesh | Add a custom frame mesh here. The bounds need to be the same as the standard frame meshes. (See custom door mesh) |
| Custom Top Mesh | Add a custom frame top mesh here. |
| Custom Top Glass Mesh | Add an optional custom glass mesh for your top frame window. |
| > Advanced | |
| Frame Thickness Scale | This will scale the frame, the door, and all attached hardware. Use with care. |
| Door Frame Offset | tbd |
| Top Window Offset | Add a height offset here (eg to make space for a beam) |

Handles
| > Handles | |
| Add Handle Inside | Weather to add a handle inside. The door opens to the inside. |
| Add Handle Outside | Weather to add a handle outside. |
| Add Handle Plate Inside | Weather to add a handle plate to the handle inside. |
| Add Handle Plate Outside | Weather to add a handle plate to the handle outside. |
| Add Lock Plates | Weather to add additional lock plates inside and outside. |
| Handle Mesh | The mesh used for both handles if no entry handle is selected. |
| Plate Mesh | The plate used to cover where the handle enters the door. |
| Lock Plate Mesh | A lock plate is where you enter your key. Change it here if needed. |
| > Materials Handles | Add materials here to replace the existing materials for all handles and plates. |
| Handle Height | Change the height where the handles are placed from the floor here. |
| Lock Height | This changes the height of the additional lock mesh relative to the handle. Negative values will be below the handle and positive values above it. |
| > Advanced | |
| Handle Offset | This is the offset from the handle to the door. Some handles don't have plates and you need to use this to move the handle closer to the door. |
| Handle Offset Outside | Additional offset for the outside handle. |
| Handle Horizontal Offset | The distance from the door edge is usually standard and depends on the hardware used. You may change this here for visual reasons. |
| Entry Handle Vertical Offset | Change the position of the entry handle. |
| Door 2 has Lock Plates | Weather the 2nd door of a double door has lock plates |
| Move Handle Outside | This enables the movement of the handle set as the entry handle. |

Interactive Door
| > Interactive Door | |
| Auto Open | This is the default for interactive doors. The door will open when a player is entering the collision box. The door mobility needs to be set to 'Mobile' in the General Settings. |
| Note: | You need to send a message to the door if
Auto Open is disabled. You can use the 'Blueprint Interface' to do
that. It is implemented in the provided character in the
Blueprint/Others folder. It is relative easy to implement. |
| Initially Open | This will open the door as soon as the walk through starts. You will hear it opening. |
| Desired Rotation (Location) | How far should the door open? |
| > Collision Location Offset | Change the location of the wireframe collision box. |
| > Collision Scale | Change the size (scale) of the wireframe collision box. |
| > Advanced | |
| Text Offset In / Out | Adjust the position of the pop up text for non automatic doors. |
| Text Hint | Change the pop up text here. |
| Text Render Color | Change the color of the pop up text here. |
| Closing Sound | Add a sound asset here or leave the default sound |
| Opening Sound | Add a sound asset here or leave the default sound |
| Note: | Standard double doors will only have one
door opening. Use the Flip Door switch in the general settings to
change which door opens. Sliding doors have an additional option to open both door. |

Hardware
| > Hardware | |
| Add Hinges | Weather to add hinges to the door. |
| Hinges Door Mesh Hinges Frame Mesh |
Change the hinges meshes here if needed. You can add your own hinge mesh but it needs to be positioned the same way as the standard ones. |
| > Materials Hardware | An a material array element for each ID |
| Index [0] | Index [0] should be the metal part of any of the hardware meshes. |
| Hinges Amount | How many hinges should the door have? 2 or 3 is standard. |
| Add Shutter | Weather to add shutter meshes to the door and frame. |
| > Advanced | |
| Edge Distance | The distance from the top and bottom edge to the hinges |
| Shutter Door Mesh | The mesh for the shutter in the door |
| Shutter Frame Mesh | The mesh for the shutter attached to the frame |

Variations set by User Interface
| > Variations | |
| Swap Materials With UI | If this feature is turned on. |
| Tag In | A tag the blueprint is listening to. This can be sent from another blueprint actor, like the Variations Actor of the UI3 user interface. |
| > Variation Materials | Add an array index for each part that should have variations. Like the door, the frame, or the handles. |
| Part | Select which part of the door blueprint should be changed. Not everything is changeable at the moment. |
| > Variations | |
| > Index [0] | Add an index per material ID that should be changed. Lets say the door has 3 material IDs and you want to change the first 2 of them. Add to array elements here. |
| > Materials | |
| Index [0] | The first variation of the first material ID |
| Index [1] | The 2nd variation |
| Index [2] | The 3rd variation of the first material ID |
| > Index [1] | The 2nd material ID of the mesh that should have variations |
| > Materials | |
| Index [0] | The first variation of the 2nd material ID |
| Index [1] | The 2nd variation |
| Index [2] | The 3rd variation of the 2nd material ID |

Custom Door Blueprint
Update Dec-22 2022.This blueprint lets you combine any door and frame mesh to an interactive (opening) door or gate.
Quick guide
- Add the main door mesh
- Correct the rotation
- Add the frame mesh
- Correct the frame rotation
- Scale and position the frame
- Use Door Offset Frame and Custom Door Scale to align the door to the pivot of the hinges
- Use the Hinge and Handle Offset to fine tune the position
- Add the remaining door meshes if there are any
- Add hardware and handles if needed

| > General - same as standard blueprints | |
| > Door | |
| > Door Meshes | Add an array element for each mesh that combines as the door. |
| Index [0] | The array ID equals the material ID (in Unreal). If you would want to change index [2] you would need to add 3 array elements and leave [0] and [1] empty. |
| Static Mesh | Add a static mesh |
| Materials | Add material override(s) for this mesh. |
| Door Rotation Correction | Align the door to the standard door or frame |
| > Door Offset Frame | The general offset of the door relative to the frame. Align the red dot to the point the hinges pivot point would be. The door will rotate around that pivot. |
| > Door Offset Hinge | This will offset the door to the red dot (pivot) if necessary. |
| > Door Offset Handle | This aligns the little white dot. Align it to the end of the door where the door shutter would be. (Not where the handle would be) |
| > Custoom Door Scale | Modify the scale if necessary. |
| > Advanced | |
| Calculated Door Offset | This is an info only. You can't change this. Change Door Frame Offset instead |
| Custom Door Size | Info only. |
| Scaled Door Size | Info only. |

| > Frame | |
| Custom Frame Mesh | Add the frame mesh |
| Note: | Any additional parts of the frames would need to be added manually. You can use CTR+G (or right click menu) to group the blueprint with those meshes. |
| > Materials Frame | Add an array element for each of the material you want to change. |
| Frame Rotation Correction | Use this to give the frame the same direction as the stand-in frame. |
| Frame Scale | Scales the frame |

| > Handles | |
| ... | ... |
| > Materials Handles | Add materials here to replace the existing materials for all handles and plates. |
| Door Thickness Offset | This offsets the handles and plates on the inside if the door is not 4cm (units) thick. |
| Handle Height | Change the height where the handles are placed from the floor here. |
| Lock Height | This changes the height of the additional lock mesh relative to the handle. Negative values will be below the handle and positive values above it. |
| > Advanced | |
| Move Handle Outside | This enables the movement of the handle set as the entry handle. |
| Handle Horizontal Offset | The distance from the door edge is usually standard and depends on the hardware used. You may change this here for visual reasons. |
| Handle Offset | This is the offset from the handle to the door. Some handles don't have plates and you need to use this to move the handle closer to the door. |
| Handle Offset Outside | Additional offset for the outside handle. |
| Handle Vertical Offset Outside | Change the position of the entry handle. |

 Top of page