Pages in Documentation

Settings

UI3 Overview

[old] Doors UE5

Quick Start

Swap Actor

Custom Assets

System Drawings

Step by Step

Tips & FAQ

Settings

Multi-Unit-Prj

Google Data Sheets

Data Tables

Video Guides

Quick Videos

Designer

Cost Tracking

Widget Panels

Quick Guide

Scene Settings

Connect BP

VR projects

Version History

F. w. Preview
Fix Known Bugs
UI Settings

UI Layout

Gamemode

FAQ + TIPS

V4 Functions 2

V4 Functions P1

V4 Quick Guide

Ver History

V3 Placements

V3 Mesh Def.

V3 Segments

V3 Quick Start

Books V2

Books V1
Customize
Quick Guide

Swap Actor

FAQ + TIPS

Doors UE4 (V1)

3.1 Bugs Fixes

Ver History
![[2 A] Generic Meshes On Spline Blueprint ../images/architecture/0023/v2-generic/thumbs/01.jpg](../images/architecture/0023/v2-generic/thumbs/01.jpg)
V2 Generic BP
![[2 B] Generic Spline Blueprint Examples ../images/architecture/0023/v2-examples/thumbs/01.jpg](../images/architecture/0023/v2-examples/thumbs/01.jpg)
V2 Examples
![[1] Railings Clone Blueprint Documentation ../images/architecture/0023/v1/thumbs/01.jpg](../images/architecture/0023/v1/thumbs/01.jpg)
V1 Railings Fences

UI 1 - Part 1

UI 1

Ui 1 - Part 2

1 Overview

UI2 Features

UI2 Get Started

UI2 Info Map

UI2 BP Actors

UI2 User Manager

UI2 FAQ

UI2 Tutorials

UI3 Overview

Getting Started

3.1 Info Map

Variation Actor

Blueprints
Interactive Door Blueprint - Custom Meshes
You may want to add your own set of doors or door handles to the door blueprint. This page explains what you can do.
Content:
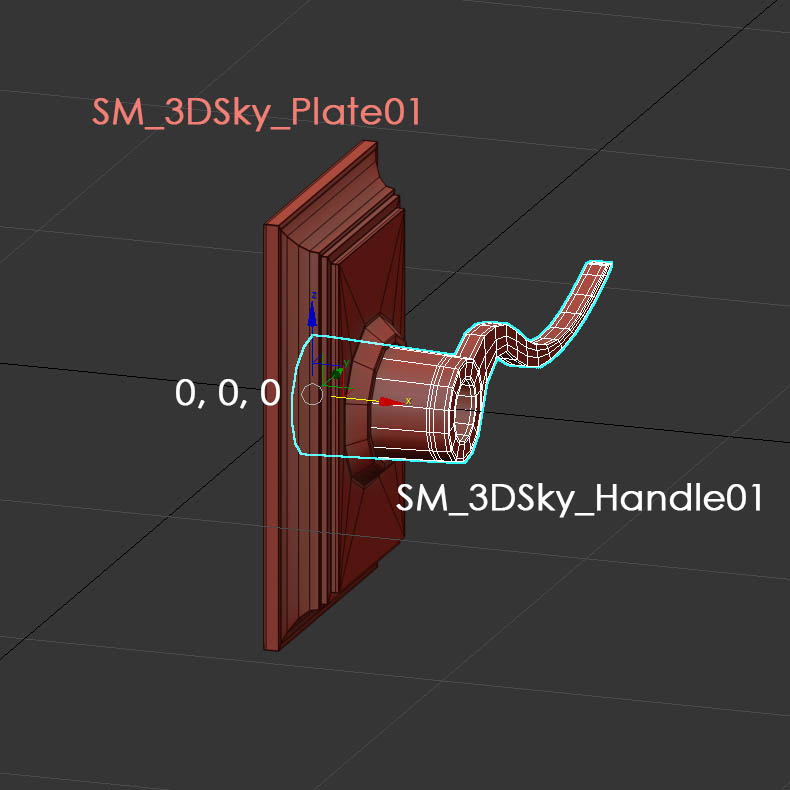
Best to place their origin at 0,0,0. You can also use the Transform in the setting to align them, but you would have to do this every time you use the new handle.
There are 2 meshes now that can be imported into unreal
- SM_3DSky_Handle01
- SM_3DSky_Plate01

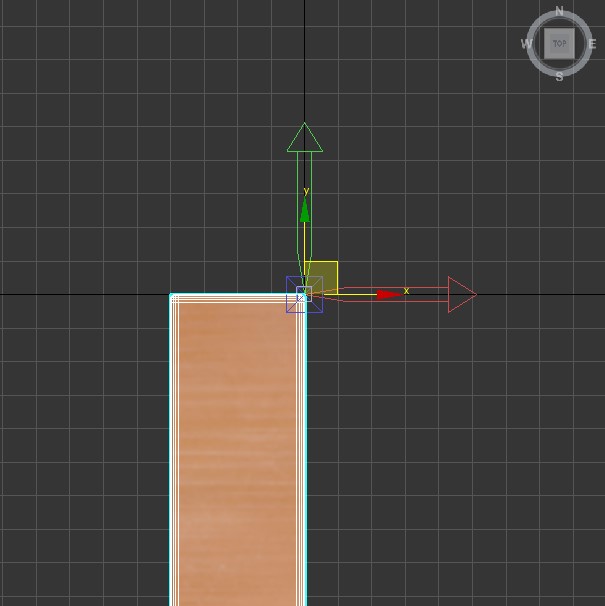
The door mesh ideally should be located with its right front bottom edge on the 0,0,0 origin and rotated in negative Y position.
There is an auto fit option for doors in the blueprints.
The door blade width is listed in brackets in the drop-down list. The identifier (MH = medium high) is part of the mesh name, for example SM_MH_DoorA. I recommend naming custom doors the same way.

- Open the Get Door Type function in the library
- You can see how all type functions are connected to the Select node. You're already done if you used Door Type X for your set. Skip the next 2 items.
- Place your new function into the blueprint
- Connect it to the new slot in the Select node
- Compile the library and save it
- Compile and save all door blueprints


 Top of page
 Auto Fit Doors