Table Of Content

V4 Quick Guide
V4 Functions P1
V4 Functions 2
V3 Segments
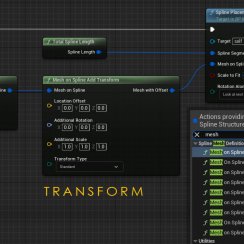
V3 Mesh Def.
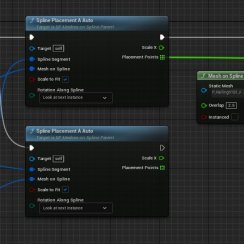
V3 Placements
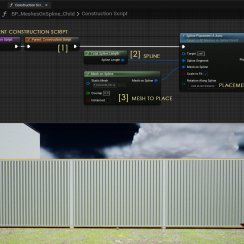
V3 Quick Start
![[2 A] Generic Meshes On Spline Blueprint ../images/architecture/0023/v2-generic/thumbs/01.jpg](../images/architecture/0023/v2-generic/thumbs/01.jpg)
V2 Generic BP
![[2 B] Generic Spline Blueprint Examples ../images/architecture/0023/v2-examples/thumbs/01.jpg](../images/architecture/0023/v2-examples/thumbs/01.jpg)
V2 Examples
![[1] Railings Clone Blueprint Documentation ../images/architecture/0023/v1/thumbs/01.jpg](../images/architecture/0023/v1/thumbs/01.jpg)
V1 Railings Fences
Ver History
V3 - Mesh On Spline Definition Nodes
These Nodes are used to define the mesh, the mesh position, and the materials on the spline.

Content:
Introduction
Mesh On Spline nodes define the mesh that will be placed onto the spline segment. There are 3 types of nodes:- Mesh definition nodes
- Transformation nodes
- Material definition nodes
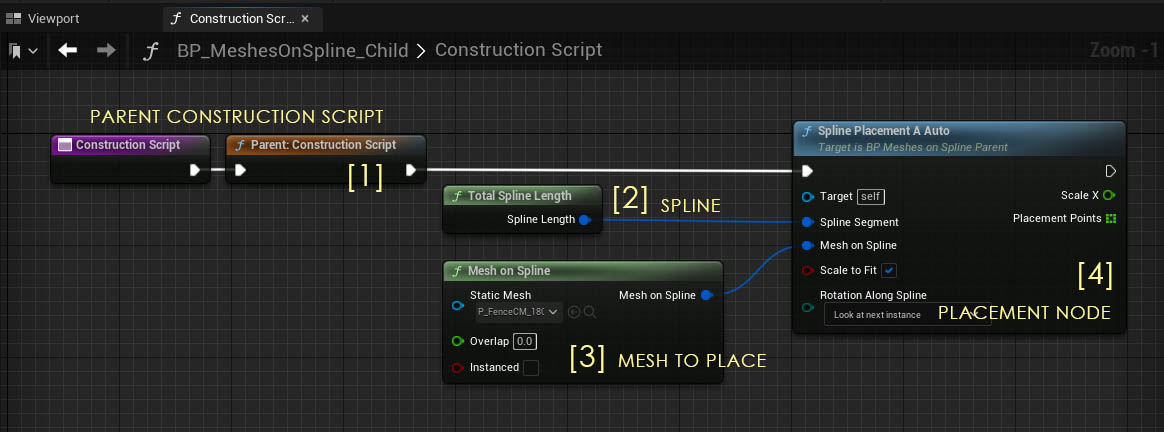
The Mesh Definition Node that has to be plugged into into the Placement Nodes Mesh On Spline pin.
Transformation Nodes are optional and are placed between the Mesh Definition and the Placement Node.
Material Definition Nodes are like transformation nodes. Only that they will modify the mesh materials.
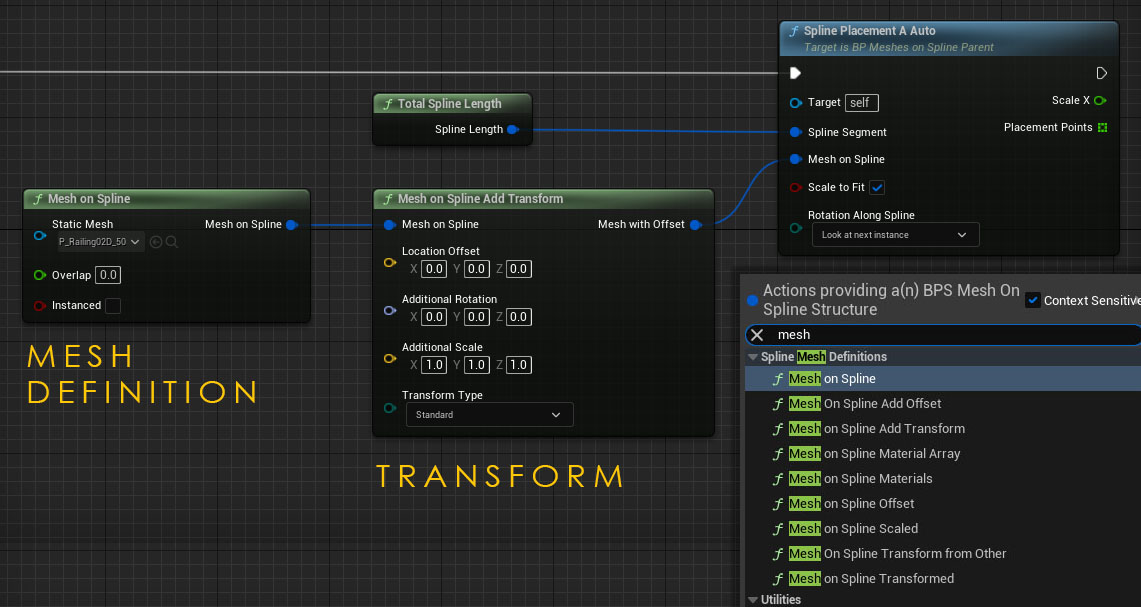
Mesh Definition Nodes
Mesh On Spline Transformed
This node gives you the most options but uses the most amount of space in the graph. There are also nodes will less options.
| Input Pins | |
| Static Mesh | The static mesh that should be placed on the spline |
| Overlap | How much the mesh placements overlap. Negative values will create a gap. |
| Instanced | Instanced Static Mesh actors are rendered as
one
mesh and can improve performance. This is set as default for the
Unreal 4
version. In Unreal 5 this version is disabled by default to allow the use of Nanite meshes. |
| Orientation | This orients (rotate Z axis) the static mesh on the spline. Affect the size calculations. Use this for the initial rotation of the static mesh. |
| Location Offset | Moves the meshes spawn position relative to the calculated point on the spline. |
| Rotation | Rotates the mesh relative to the spline rotation and rotation type. |
| Scale | Scales the meshes. Scaling in spline direction will affect the size calculation. |
| Output Pin | |
| Mesh On Spline | Use this to connect to another Mesh On Spline Definition node or the Placement node. |
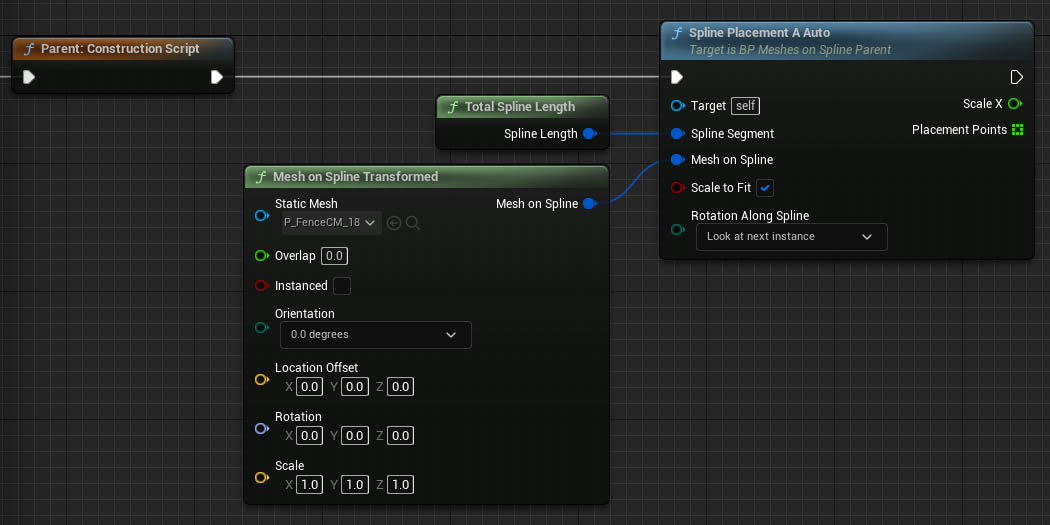
Mesh On Spline
Mesh On Spline Offset
Mesh On Spline Scaled
These nodes are the same as Mesh On Spline Transformed with less options. Using them may improve the readability of your blueprint.

Mesh On Spline Random Mesh
UNREAL 5 ONLY
Places a random mesh from the mesh array provided. You have to Promote the array to a Variable and then set the array elements in the Details Panel.
Details Panel
| > Default | |
| > Random Meshes | Add an array element for each mesh option |
| > Index [0] | array element |
| Static Mesh | Add the static mesh from the content browser |
| > Materials | Changes the default materials of the mesh (optional) |
| > Transform | Align the mesh options to each other (optional) |
| Priority | Higher values make it more likely that this option will be picked |
| > Index [1] | another array element |
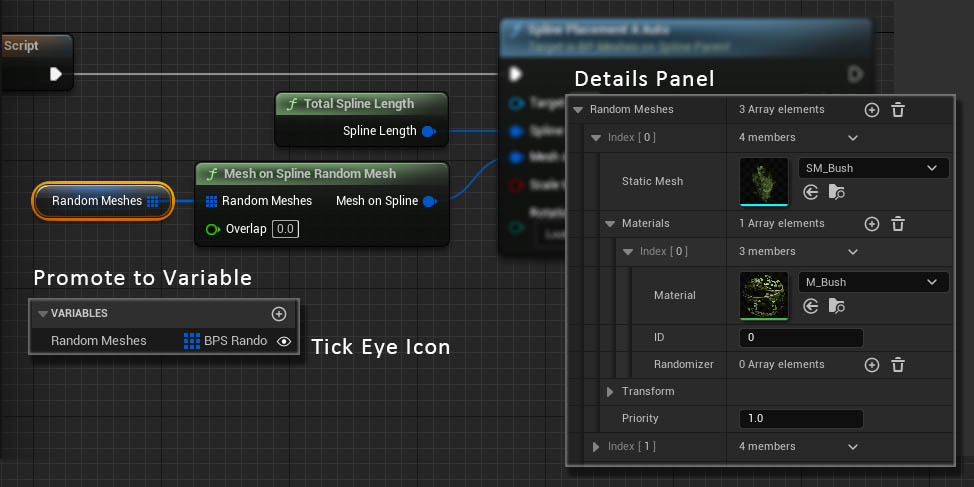
Transformation Nodes
These nodes go between the Mesh On Spline Definition nodes and the Placement. You can have multiple of them in a row.| Input Pins | |
| Mesh On Spline | Connect from a Mesh On Spline or another Definition Node. |
| Location Offset | Moves the meshes spawn position relative to the calculated point on the spline. |
| Rotation | Rotates the mesh relative to the spline rotation and rotation type. |
| Scale | Scales the meshes. Scaling in spline direction will affect the size calculation. |
| Transform Type | Applies the transformation - Standard: normally - Random: within the range of values entered. - Incremental: multiplied by the index of the mesh placed on the spline. The first mesh (index 0) will have no transformation |
| Output Pin | |
| (Mesh On Spline) | Use this to connect to another Mesh On Spline Definition node or the Placement node. |
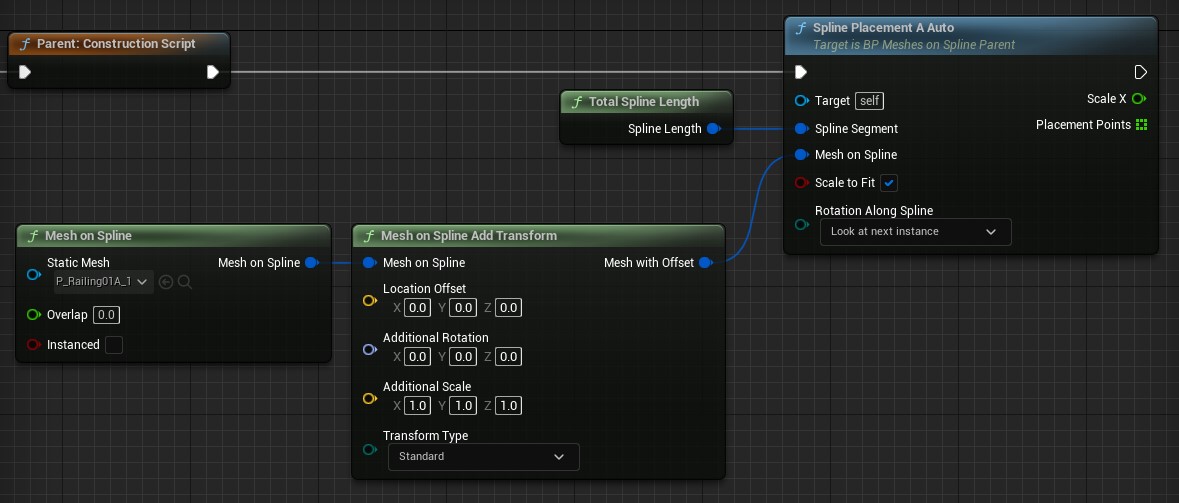
Mesh On Spline Add Transform
Ideal to add some slight randomness to the meshes placed.
Mesh On Spline Add Offset
This is primarily thought to be used to add incremental height offsets for stairs.

Material Definition Nodes
Mesh On Spline Single Material
Replaces a single material with the given ID.
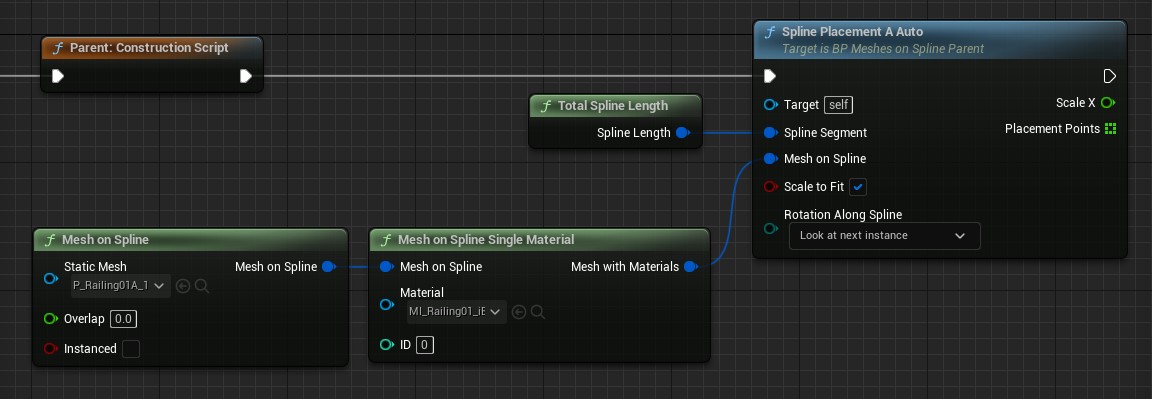
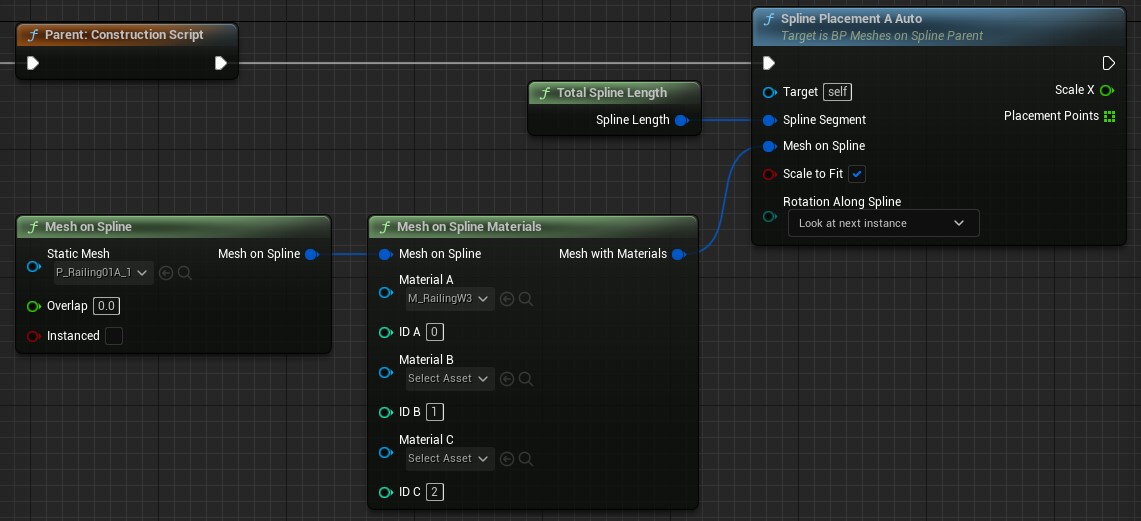
Mesh On Spline Materials
Can replace up to 3 materials on the mesh using the given ID for each of the materials.
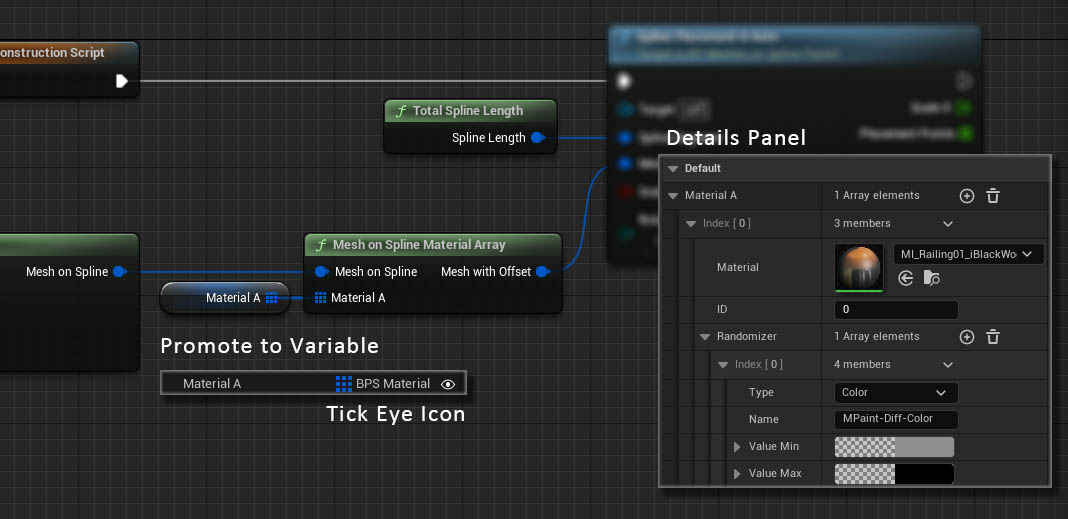
Mesh On Spline Material Array
Uses an array variable to replace materials.A randomizer array can be used to add randomness to the material. See further down for more detail.
Material Randomizer Nodes
These nodes will randomly change Parameters of the materials of each placement of the meshes along the spline. As it can be seen on this blueprint in the Showroom level.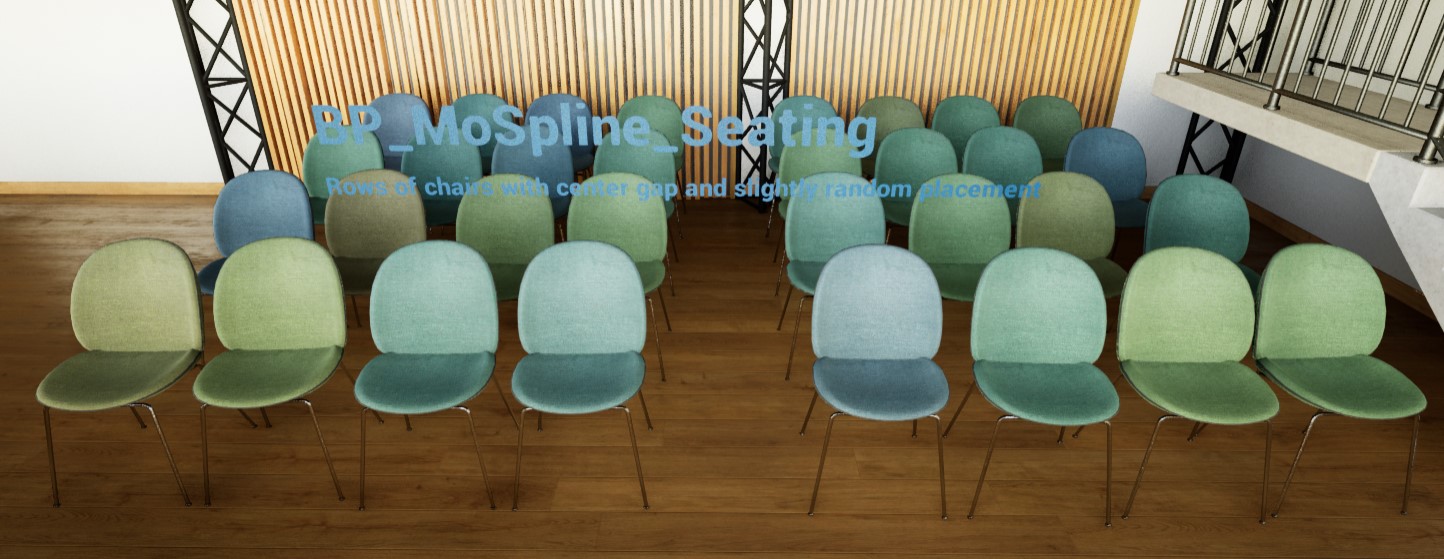
Mesh On Spline Random Mat Scalar
The image shows an example where the material paramter Hue is randomly shifted between -0.15 and 0.15 for each mesh placed along the spline.

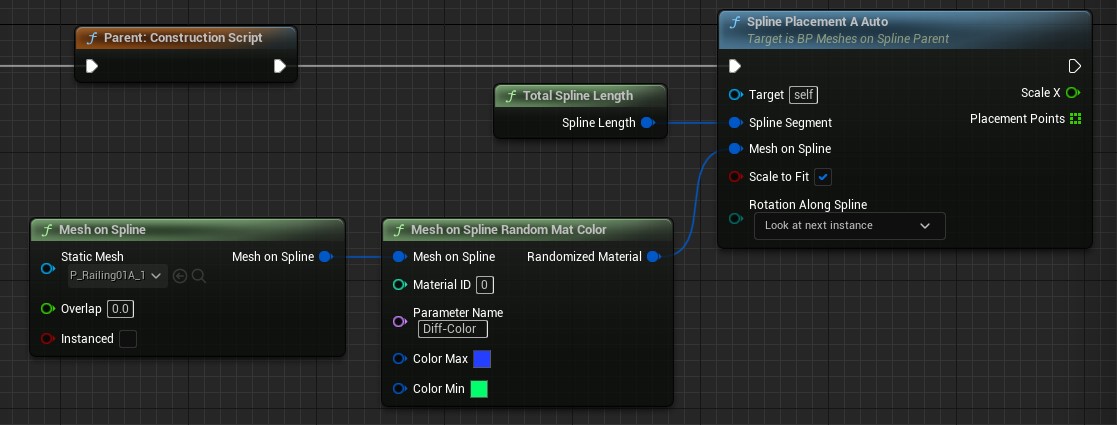
Mesh On Spline Random Mat Color
The image shows an example where the material parameter Diff- Color is randomly changed between a green and a blue tone for each placed mesh.
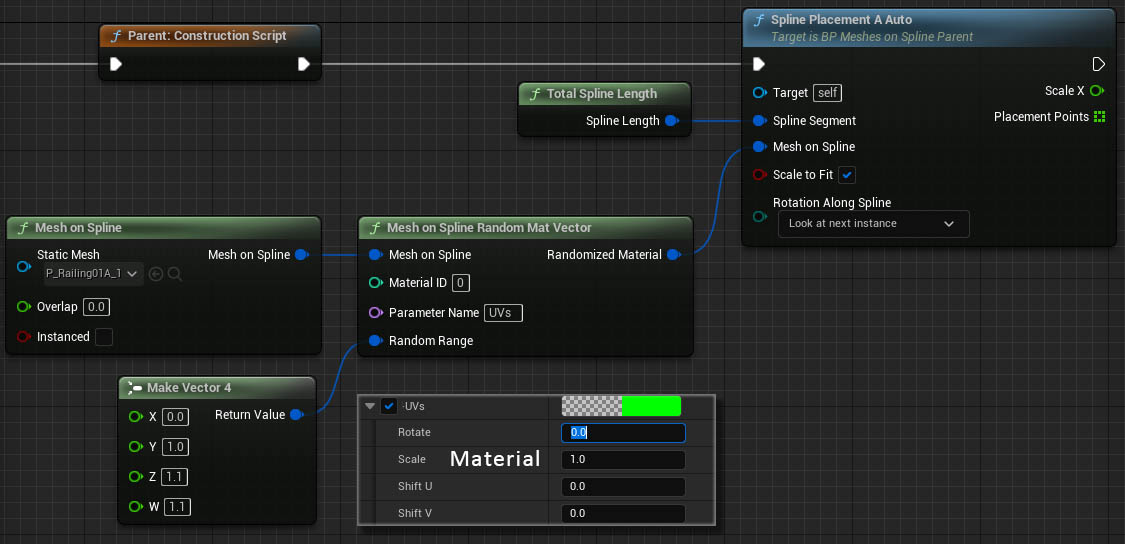
Mesh On Spline Random Mat Vector
The image shows an example where the UVs are randomly shifted by a certain amount.
 Top of page