Table Of Content
Quick Guide

Swap Actor
Customize

FAQ + TIPS

Doors UE4 (V1)
Interactive Door Blueprint - Quick Guide
Quick Guide for the Interactive Door Blueprint available on FAB and the Unreal Marketplace.
Interactive Door Blueprint - MarketplaceContent:
Installation
The Interactive Door Blueprint will appear in the Vault in the Epic Games Launcher after your purchase. Add it to your project by clicking the yellow button.
The latest version will be downloaded. Allow to overwrite existing files if you are updating. Already placed doors will stay where they are. Some settings may have to be adjusted.

Content Directory
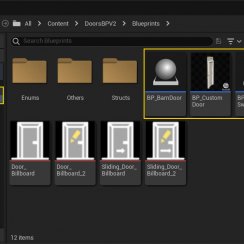
The product will be installed in the content folder of your project. There are 5 Blueprints in MyProject / Content / DoorsBPV2 / Blueprints- BP_StandardDoor
- BP_SlidingDoor - sliding into wall cavity
- BP_BarnDoor - Barn style door hanging down from tracks
- BP_CustomDoor - somewhat experimental
- BP_Doors_SwapActor - link to UI3 or other widgets

General Settings
Position the blueprint into the wall opening in your scene. The origin is in the center of the frame for single doors. Do not scale the blueprint through its Transform. Choose the correct size instead.Hovering the mouse over a setting will give a brief explanation for it.
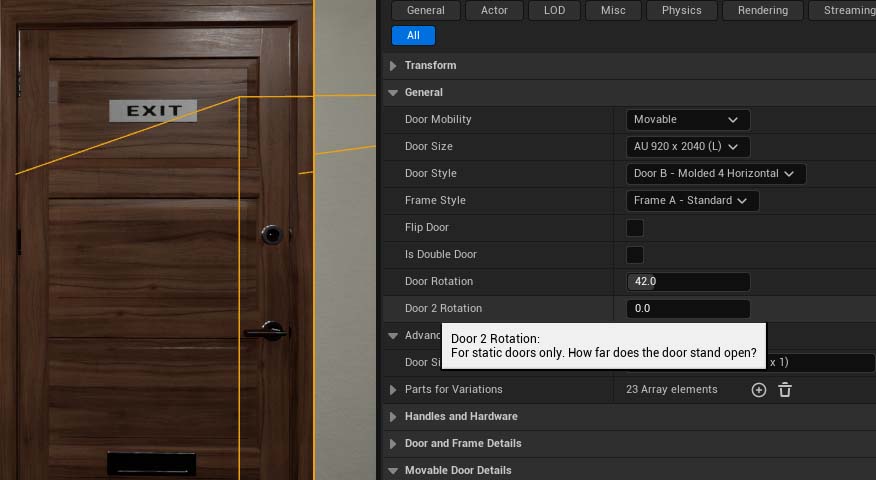
| > General | |
| Door Mobility | Choose if the door should be interactive (movable) or static. |
| Door Size | Select a size from the list. Hovering over the choice should show you the door size in mm for comparision. |
| Door Style | Select a door style from the list. |
| Frame Style | Select a frame style from the list. |
| Flip Door | Alter the opening direction if needed. |
| Frame Style | Select a frame style from the list |
- A -Standard works well with most doors
- B- Modern is simple and works well with doors type A and D
- D -Modern D is like A with an additional ornament. Sliding doors use style A at the moment.
- C - Molded is traditional and works well with door types B and C

| Door Style | Select a door style from the list. |
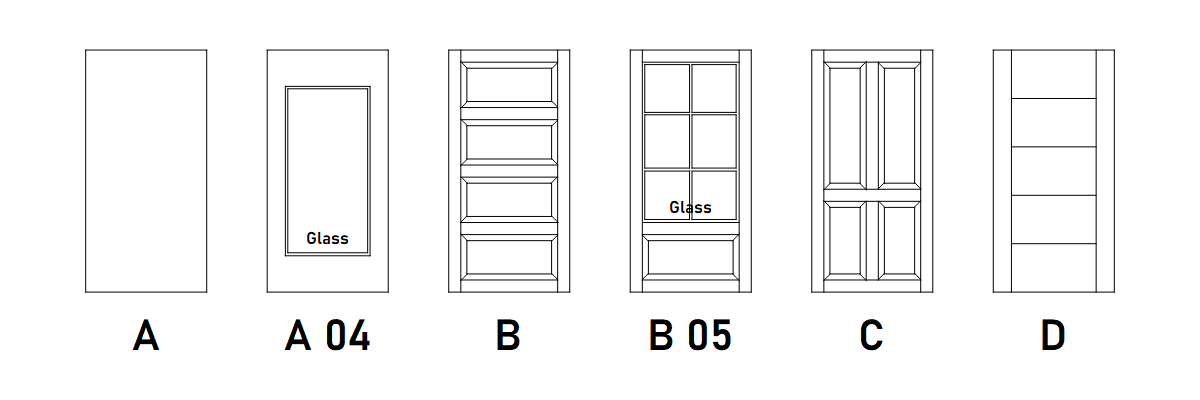
The list has 6 door types plus a frameless glass door. Two of the doors have glass windows: A 04 and B 05.
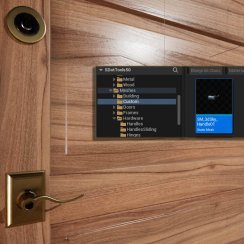
A few more doors can be found in the Meshes / Doors folder. They will need to be added as Custom Door Parts to the door blueprint.
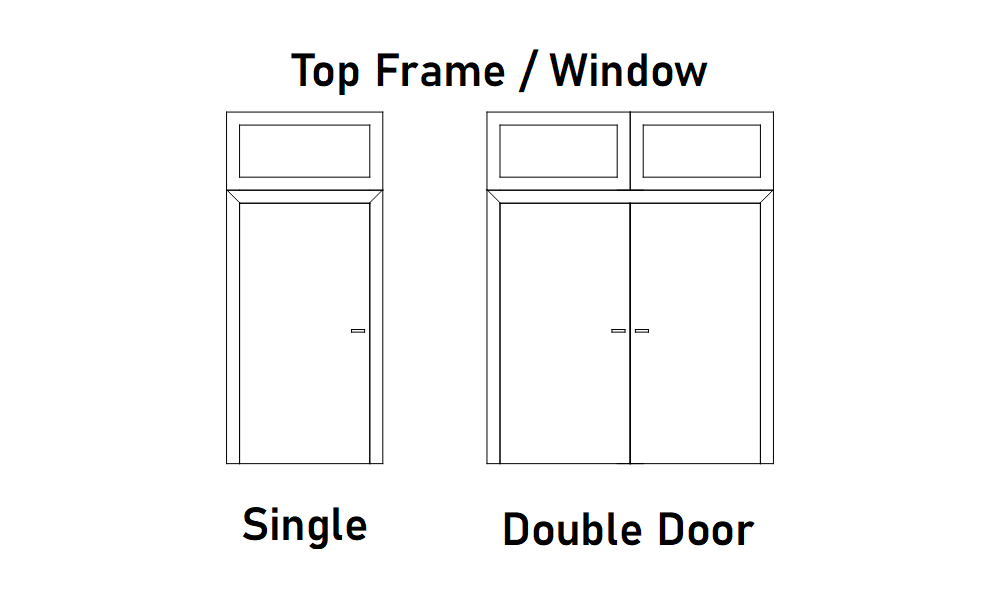
Double Doors and Frame Window (Top)
| Flip Door | This will mirror the blueprint, so the handle and the hinges are on the other side. |
| Is Double Door | Ticking this box will turn the single door into a double door. |
Double doors are available for Standard, Sliding, and Barn Doors.
Flipping the double door will work and can be used to move the opening door to the other side.
| > Door and Frame Details | |
| Has Top Frame Window | Ticking this will add a top frame with a window above the door |
This tick box will add a window to above the door. It works with Standard, Sliding, and Barn Doors. It works with single and double doors. Currently the frame is a standard style frame for all frame style options.
Hardware
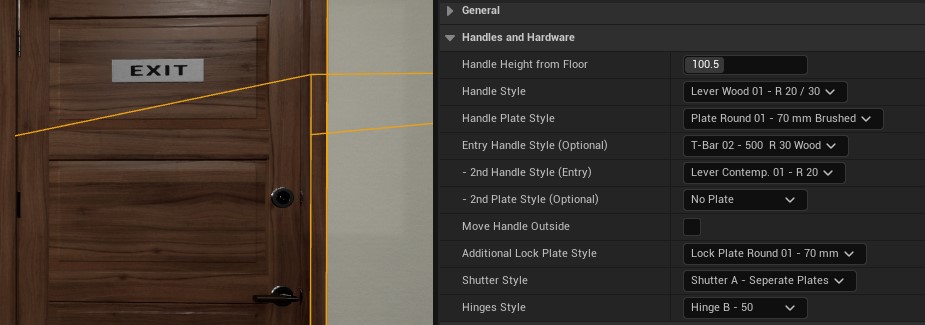
Handles, Handle Plates, Hinges, and Shutters are added to the door and frame by default. Have a look at this image if you are unfamiliar with the naming of hardware.
| > Handles and Hardware | |
| Handle Height from Floor | Adjust the Vertical Handle Position |
| Handle Style | Choose a style for the handles from the list |
| Handle Plate Style | Choose a plate style from the list |
| Entry Handle Style - 2nd Handle Style - 2nd Plate Style |
Choose a different style for entry doors if
necessary. You can also select different plate style for entry doors.
(The door opens to the inside) |
| Additional Lock Plate Style | Weather to use additional lock plates. You can adjust the position in the Handles and Hardware Details section. |
Materials
Materials are set in the Door and Frame Details or Hardware Details section.Add multiple materials like you would do in the Static Mesh Editor if necessary. ID [0] is for the main parts of the door or frame, and for hardware it's the main metal part.
Glass Material is for both glass windows in the door and over the frame. Full Frame Glass Doors are set through the Door Material ID [0]
Custom Meshes use the material set in the "Parts" array.

 Top of page