Table Of Content
Quick Guide

Swap Actor
Customize

FAQ + TIPS

Doors UE4 (V1)
Interactive Door Blueprint - Custom Meshes
You may want to add your own set of doors or door handles to the door blueprint. This page explains what you can do.
Content:
Door Handle Meshes
I downloaded this free set of door handles from 3D Sky.
The model looks clean. I should be able to use it without many adjustments. Just pay attention to the Material IDs and maybe the Smoothing Groups.

Best to place their origin at 0,0,0. You can also use the Transform in the setting to align them, but you would have to do this every time you use the new handle.
There are 2 meshes now that can be imported into unreal
- SM_3DSky_Handle01
- SM_3DSky_Plate01
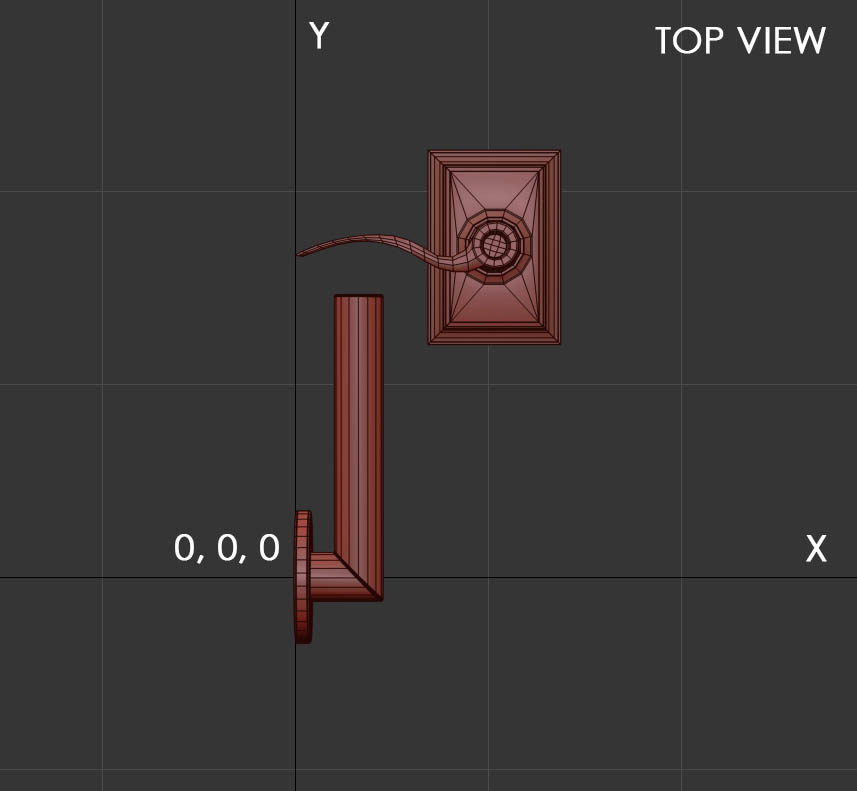
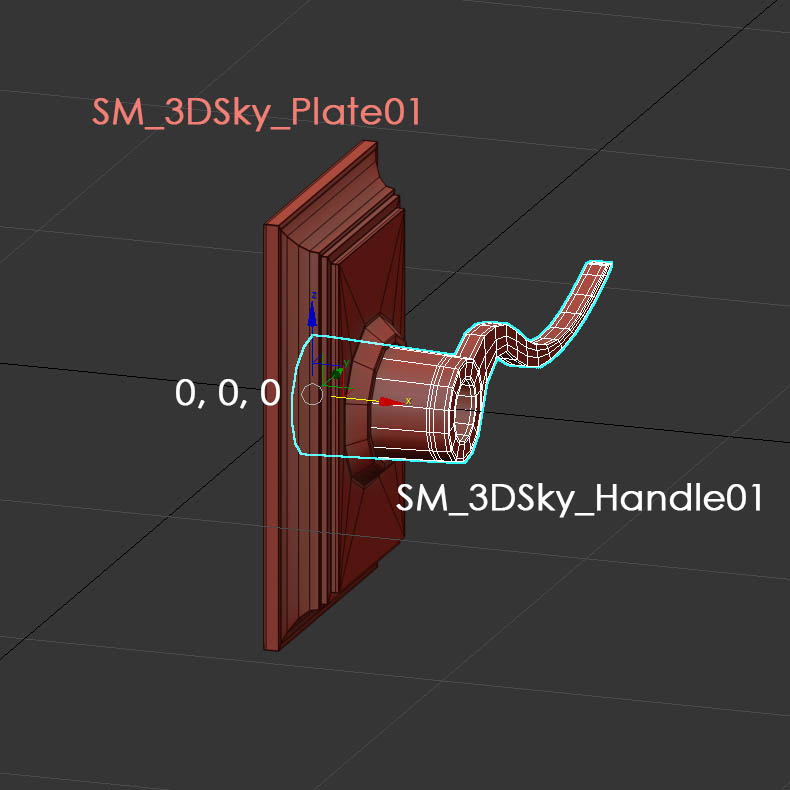
| Handle Offset | Use this to move the handle further away from the plate as this plate is thicker than the standard 1.0 cm. |
I did not import Materials from the 3DSky package. There are already metal materials in the project.
A few tips:
- The handle is quite thin. Arch Viz mesh details tend to be a bit on the thinner side and can look flimsy in Unreal.
- Small detail gets lost. You have to exaggerate small details to be visible or use normal maps.
- Everything needs a chamfer. But it will be invisible if too small.
- Rely more on geometry instead of smoothing groups. Add lines on edges where it matters. Dividing a flat plane multiple times in the middle doesn't improve anything.
- Use Nanite whenever you can.

Door Meshes
Optional, the glass can be separated into a Glass Mesh to make the door mesh work with Nanite prior to version 5.4.
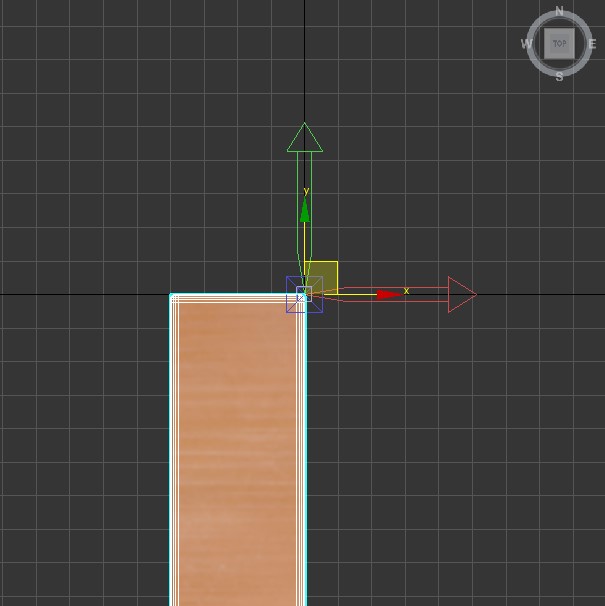
The door mesh ideally should be located with its right front bottom edge on the 0,0,0 origin and rotated in negative Y position.
There is an auto fit option for doors in the blueprints.
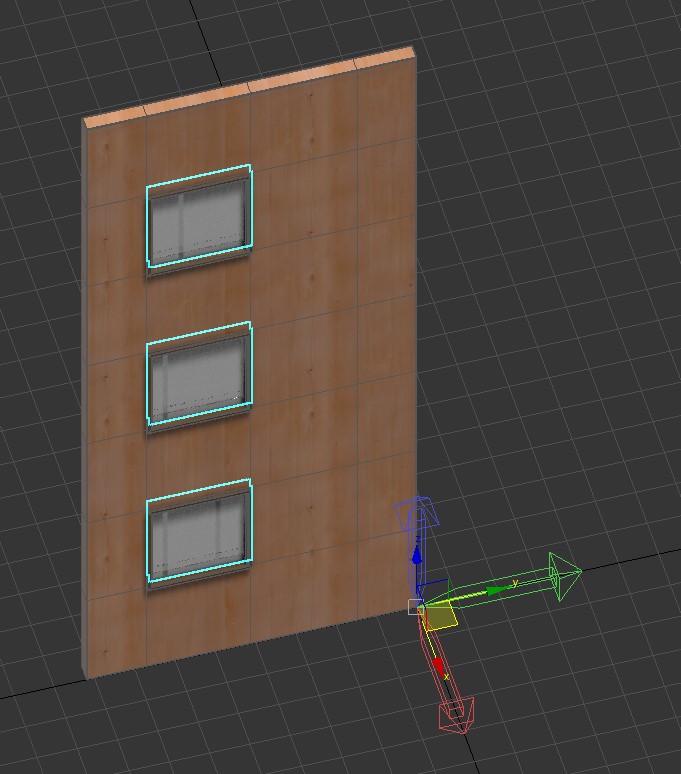
- S (small) 720 x 2040 x 40 mm
- M (medium) 820 x 2040 x 40 mm
- L (large) 920 x 2040 x 40 mm
- S (small) 720 x 2340 x 40 mm
- M (medium) 820 x 2340 x 40 mm
- L (large) 920 x 2340 x 40 mm

The door blade width is listed in brackets in the drop-down list. The identifier (MH = medium high) is part of the mesh name, for example SM_MH_DoorA. I recommend naming custom doors the same way.

Sizes can be Nominal and the actual size may be slightly different than the nominal size. You or the user don't need to care about those details. It works under hood.
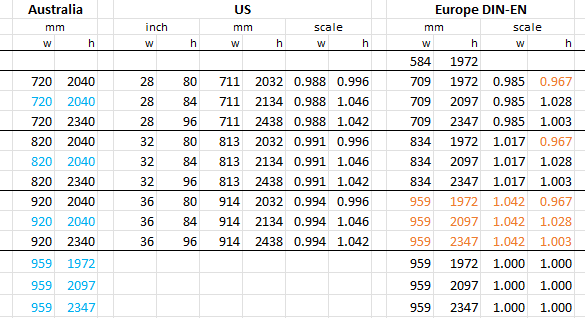
Door Sets In The Library
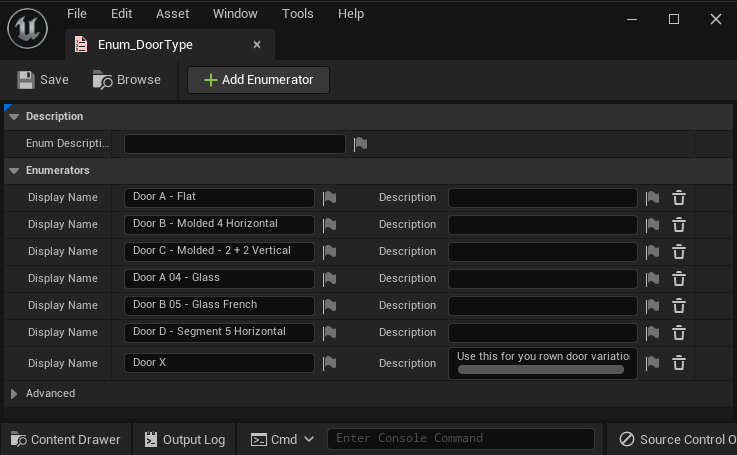
Step 1 - Enum_DoorType
Content / DoorsBPV2 / Blueprints / Others / Enum_DoorType
The enumerator has the list of door type names in it. You can either use Door X which is an empty element, or you can add your own enumerator by clicking on + Add Enumerator
Be careful not to delete, rename, or move any of the existing enumerators. Best to just add a new enumerator at the end.
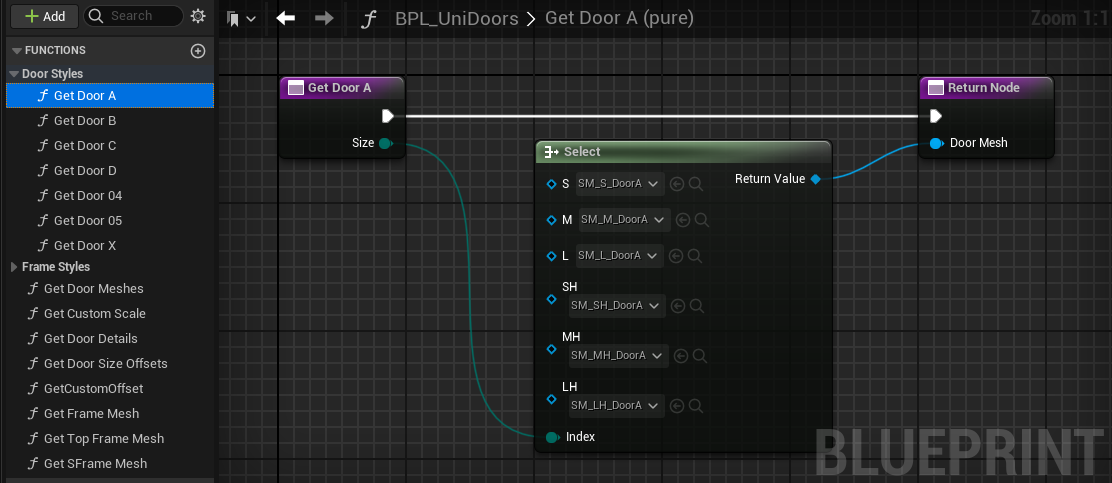
Content / DoorsBPV2 / Blueprints / Others / BPL_UniDoors
Every door type has a function in the BPL_UniDoors library. The Get Door X is an empty function you can use. Or duplicate the function it for a new door style. Door types 04 and 05 have a glass mesh which can be ignored at this time.
- Duplicate the Get Door X function and rename it.
- Import your set of 6 doors into a folder for the type
- Add the doors to the slot for the size S, M, L, SH, MH, LH
- Make sure the function is set to pure
- Open the Get Door Type function in the library
- You can see how all type functions are connected to the Select node. You're already done if you used Door Type X for your set. Skip the next 2 items.
- Place your new function into the blueprint
- Connect it to the new slot in the Select node
- Compile the library and save it
- Compile and save all door blueprints

 Top of page
 Door Handles Set - 3D Sky