Table Of Content

Quick Guide

Video Guides

Getting Started
UI Settings

Data Tables

UI Layout

Widget Panels

F. w. Preview

Designer

Variation Actor

Scene Settings

Blueprints

Gamemode

VR projects

Connect BP

Cost Tracking

Multi-Unit-Prj

Google Data Sheets

FAQ + TIPS
Fix Known Bugs

Version History
Designer
The Designer shows objects and their variations in a table like widget. Its intended use is to modify:
- Objects in the Scene that are in multiple locations or difficult to select
- External blueprint tools like the Modular Kitchen Builder or the Interactive Doors
Content:
Desinger Quick Guide
This YouTube Video is a quick guide about the Designer, how it works and in what cases it is meant to be used.Adding a Designer
Designers are created by adding an element to the Designers or from 04-2025 to the Designer Data array. Click (+) to add a new array element.Every array element contains the information for a separate designer widget. Use the element index as Feature ID in the Main Menu Layout.
The size of the icons and the widget width can be adjusted. The widget width can't be larger than the max width set in UI Panel Design.

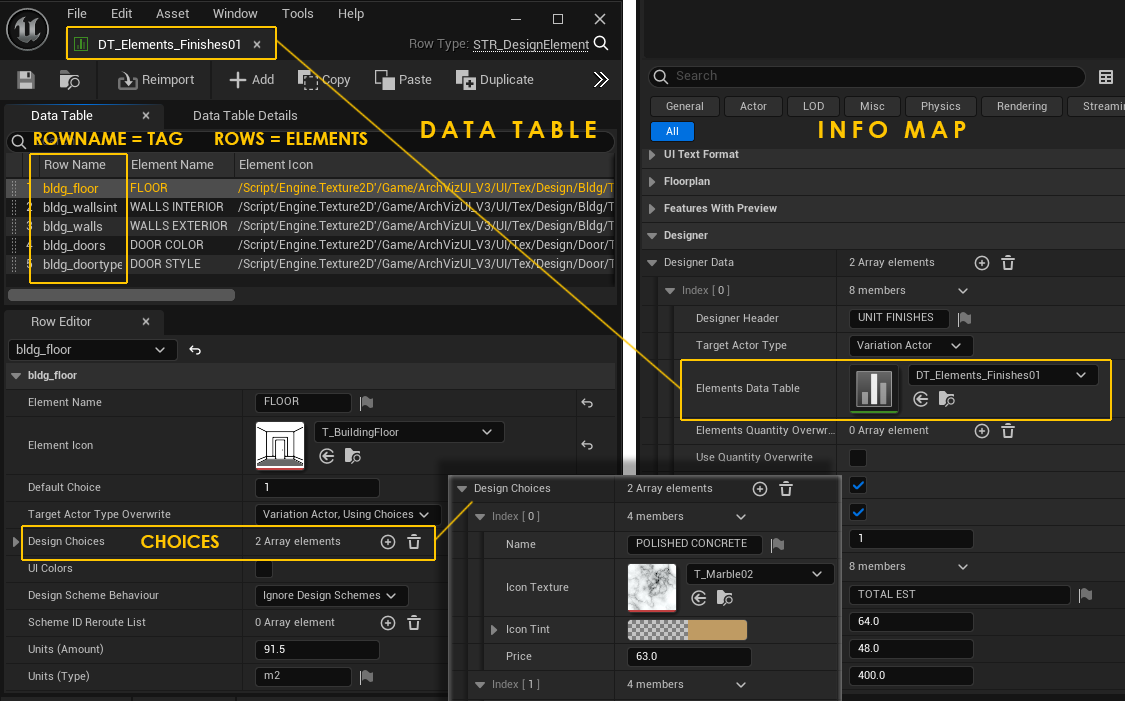
Designer Data Table
The Designer Elements are now stored in data tables so they can be shared over multiple scenes. Below documentation is still valid but the location of the elements and choices is now the data table.- double click on the Element Data Table to open and edit it
- each data table represents a single Designer
- each data table row is an Element
- the Element Tag is now the data table Row Name
- Choices are found in the Row Editor tab of the data table
The old Designers array is in the Advanced Section for reference. Designer Elements and Data Table Element can be copied and pasted between them.
Designer Settings
Designer Header appears at the top of the widget.There are two Target Actor Types
- Variation Actor - UI3 Variation blueprint actor
- External Actor - A blueprint actor not part of UI3

Designer Elements
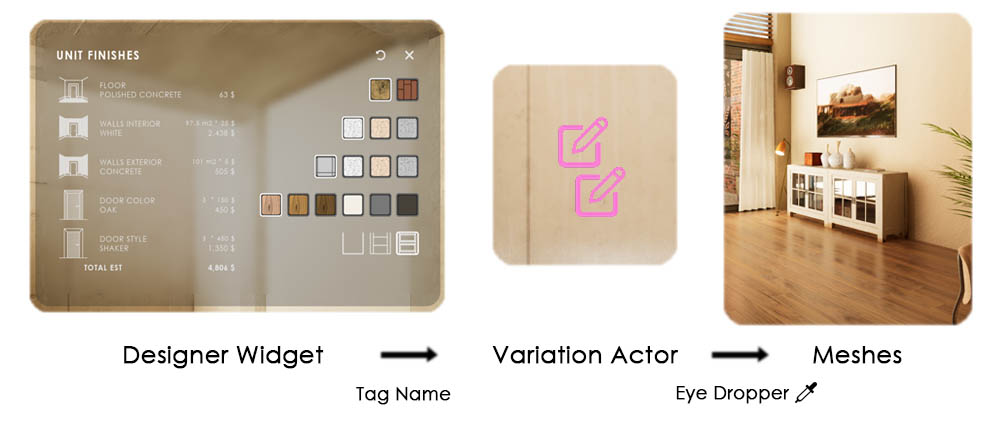
Every Design Element represents a row in the Designer widget.The Tag name is what links the Target Actor with the Designer Element. Linked Variation Actors need to be set to Link To Designer
Target Actor Overwrite overwrites the Target type set for the Designer
- None (from Designer) - no override
- Variation Actor, Using Choices - The Element uses the Designer Choices array
- Variation Actor, Receiving Details - The Element uses the Variation Details array in the Variation actor

Designer and Layout Scenarios
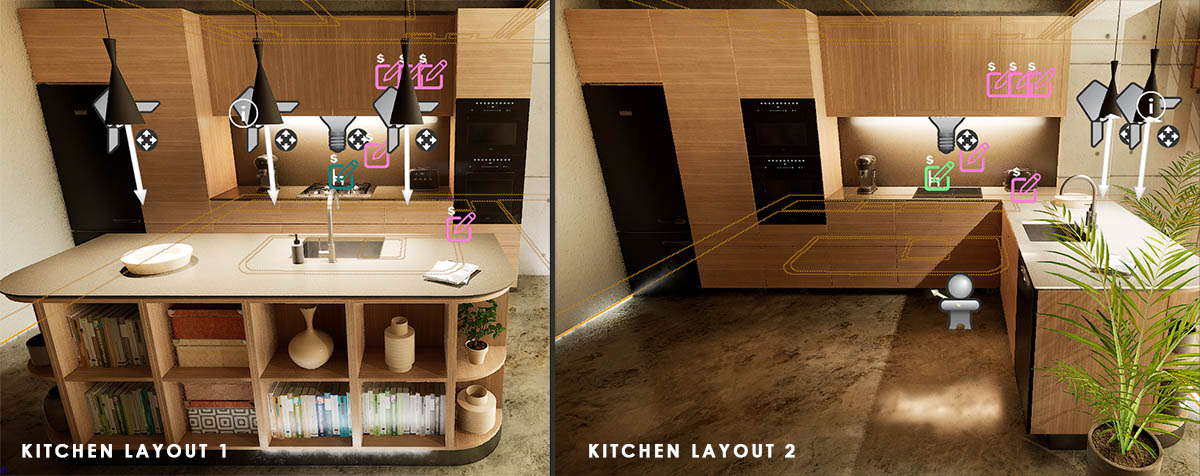
The kitchen, for example has two variation sub levels with different layout and different costs.The Designer needs to receive the updated Details from the Variation actors in the current layout level to track the cost correctly. Every kitchen layout sub level needs its own set of Variation actors.
The Target Actor Type Override needs to be set to Variation Actor, Receiving Details for the Elements that have multiple Variation Actors to listen to.
The Designer will be updated once a different scenario level is loaded.
Element Choices
Choices are added to the Design Choices array.The index of the choice is sent, and the target actor changes the variation to that ID.
Design Choices in the infomap and Variation Details in the Variation Actor are compatible and can be copied between the two actors.
Current Name and Price appear in front of the Element row.
Create preview icons with an Icon Texture and a tint color. Icons are in UI / Tex / Design
The Price is multiplied by the value set in Unit (amount) .

Designer To Variation Actor Link
Variation Actor and Designer are linked by having the same Tag name.The Variation Actor Type needs to be set to
- Link To Designer
Variation Details = Designer Choices
The Design Choices and the Variation Details arrays use the same structure. The settings can be copied between the Designer and the Variation Actors.

Designer To Blueprint Link
The Designer works well with external blueprints:- Modular Kitchen Builder
- Interactive Doors Blueprint
They can be linked by adding the blueprint interface BPI_UI3_Interaction to their swap actors.
On the Designer side, only the Tag and the Variation Details need to be added. The Target Actor Type is External Actor.

 Top of page
 UI3 Variation Actor