Table Of Content

Quick Guide

Video Guides

Getting Started
UI Settings

Data Tables

UI Layout

Widget Panels

F. w. Preview

Designer

Variation Actor

Scene Settings

Blueprints

Gamemode

VR projects

Connect BP

Cost Tracking

Multi-Unit-Prj

Google Data Sheets

FAQ + TIPS
Fix Known Bugs

Version History
Multi-Unit Projects
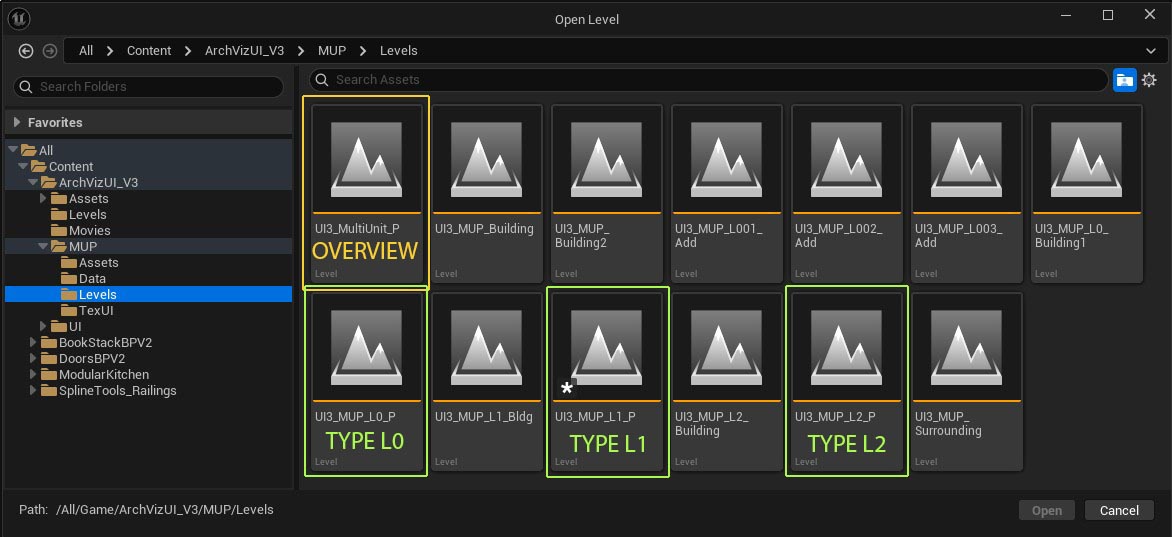
The Multi-Unit Project Example can be found in
Content / ArchVizUI_V3 / MUP / Levels
The main level is UI3_MultiUnit_P
Content:
Quick Guide for Multi Unit Projects
Quick Guide for Multi Unit Projects
Part 1 - Overview or Building Level
Part 2 - Unit Levels
MUP Levels
The project has an Overview level that contains the building shell. The user will select one of the units here.It has 3 Unit Levels for the 3 types of units in the building. Each floor has 3 units of the same type:
- Type L0 - Ground floor units, 1 Bedroom with Yard
- Type L1 - Frist floor units, 2 Bedrooms
- Type L2 - 2nd floor units, 1 Bedroom
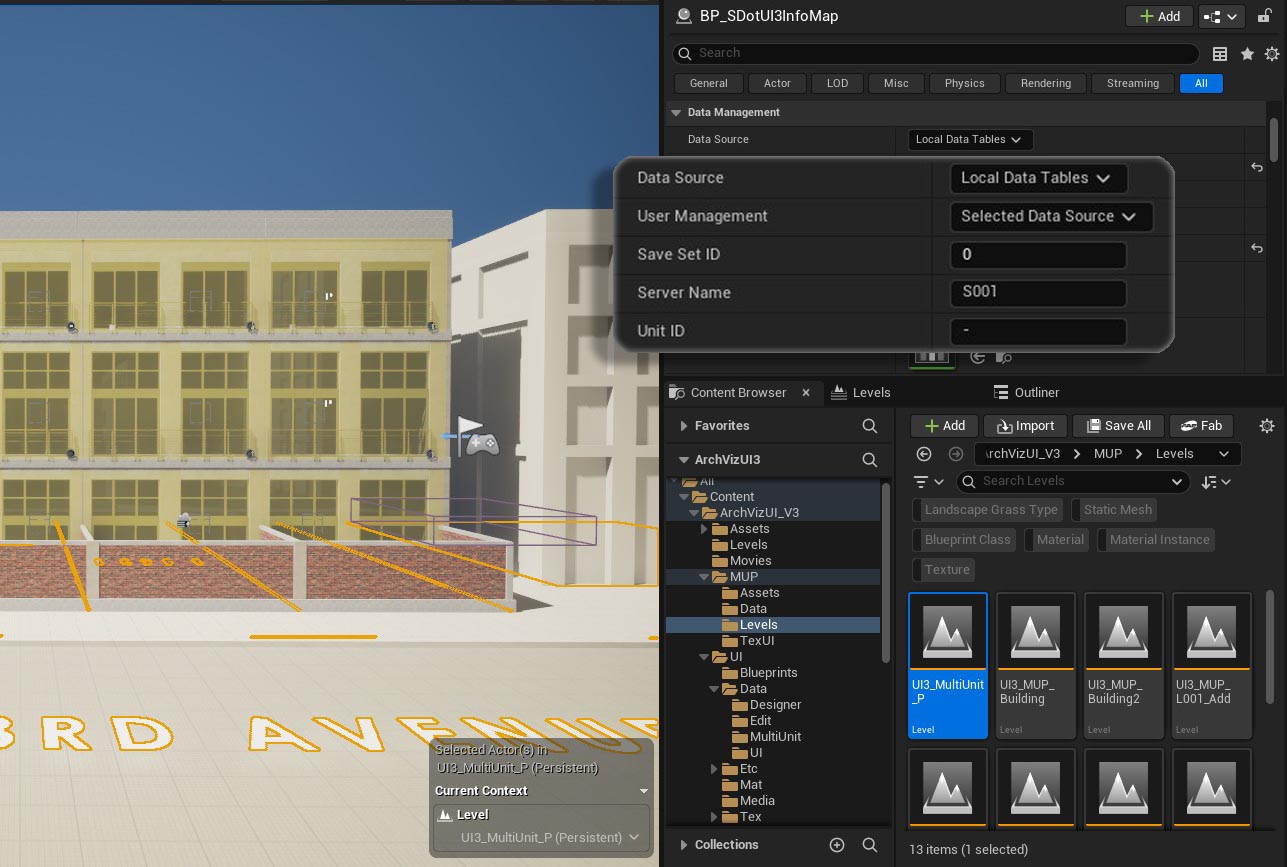
Overview Level Settings
- Data Source can either be Local Data Tables or Remote Google Sheets.
- User Management is set to Selected Data Source. The level will look up the current user when playing begins.
- Save Slot ID is ignored by the overview level. The user can't make any changes to the building shell
- Server Name (or ID) is where the overview level gets the User ID from. As defined in the Servers data source. It then gets the User Name from the Users data source.
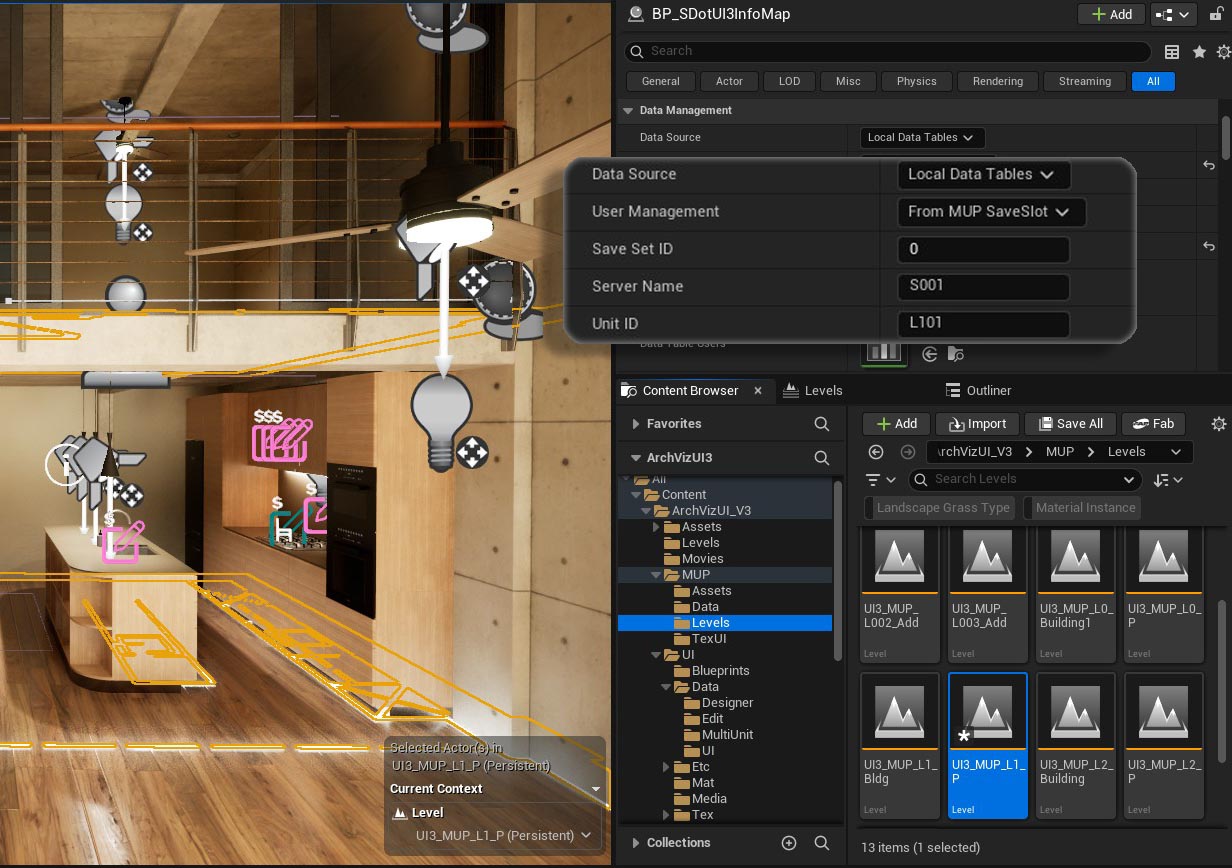
Unit Type Levels Details
- Data Source needs to be the same as the Overview level
- User Management is set to From MUP SaveSlot. The level will load the User ID and Unit ID from the MUP SaveSlot which was saved by the Overview Level.
- Save Slot ID Has to be the same for all units if design choices should be shared between them.
- Server Name and Unit ID are ignored because User Management is set to From MUP SaveSlot
Workflow

Overview Level - Unit Selection
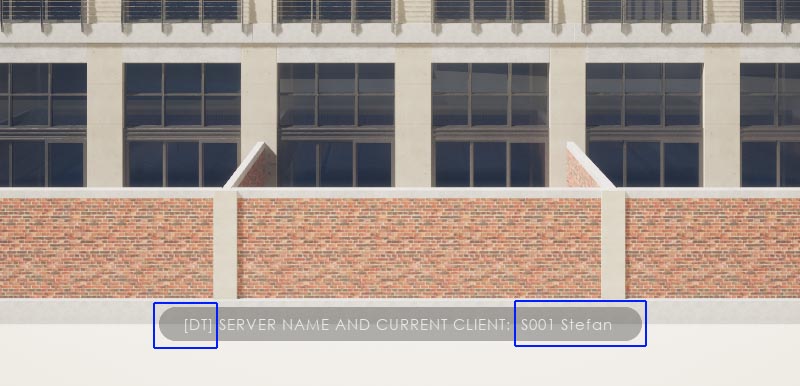
The MUP project loads the overview level first.Server ID and User Name will briefly appear at the bottom of the screen on the right.
The Data Source can be checked on the left
- [DT] = Data Tables
- [GS] = Google Sheets
The user can visit a unit from the widget or close the widget with the back button to select another unit.
User ID and selected Unit ID are saved locally and passed on to the unit type levels.
Changes can be made to the data source during play through. The updated Google Sheets data will be loaded whenever the overview or unit level is loaded.

Unit Marker
The Unit Markers are BP_SDotUI3_ObjectInfo blueprints.- Info Type - Unit Info
- Use Collision Box - True will add the yellow collision box. Scale the box to stick a bit out of the unit and be selectable.
- Unit Row Name - The Unit ID from the data source
- Billboard Positioned - Add billboards on each visible side of the unit. They will be updated from the data source

Unit Type Level
The Building has 3 floors. Every floor has 3 units with the same layout. That makes it 3 Unit Types.Example workflow
Unit L102 was selected to visit. Clicking the visit button tells the app to open Unit Type Level UI3_MUP_L1_P. The app saved the User Name and Unit ID to the MUP_SaveSlot.
This save slot is loaded by the unit level. The Unit Specs widget shows the details for unit L102.
The data table DT_MUP_UI_Units set as Main Menu Data is the same for all unit type levels. So all units have the same UI layout

Unit Type Sub Levels
The unit type levels share some sub levels and other levels are unique for each unit type.Streaming Levels
- Dynamic Lighting - this level is shared
- UI3 ScenarioK1 - this level is shared and contains the kitchen cabinets
- UI3 MUP_L1_Bldg - the building level is unique. It contains the building meshes, the build-in doors, and bathroom appliances
Surrounding Buildings - Levels with Transform
All unit type levels are placed at the same world location in the editor to allow sharing of the kitchen level and to make the work flow easier.
The surrounding levels are offset instead. This creates the illusion that the client is in the actual unit selected. The surrounding is offset and the view out of the window is correct.

To experience the offset the level has to be loaded from the overview level. The offset is not applied if the unit type level is played directly while editing. The level looks as if located at ground level.

Editor Data Tables for Units
These two data tables are used for editor specific unit settings. They always contain this data and need to be set up even if the Data Source is set to Google Sheets.Editor Data Table Units
- Offset and Rotation - defines the relative position of the unit in the building
- Unit Specific Level - names an additional level only needed for that unit. Example: the ground floor units have the building parts visible when walking to the outside set in UI3_MUP_L00n_Add.
Editor Data Table Unit Types
- Unit Type Image - preview image in the unit picker
- Level Name the main persitent level to be loaded when the visit button is clicked.

User Choices
User Choices can be saved per user name in the 5 available save slots. Choices can be re-applied in another unit under these conditions:- The Save Set ID set in the Info Map of all levels is the same
- A Designer is used. Designers use Tags to link objects
- Features with Preview can be used if they use the same data table in the Info Map

Data Source Setup
Local Data Tables
Follow the link below to set up local data tables as data source for multi unit projects.
Google Sheets
Follow the link below to set up Google Sheets in the cloud for remote access and changes to the unit data.
 Top of page
 Data Tables in UI3